![[OFFICIAL][MM][RPT] XOSP 6.3 - 3.4.67 Kernel - Final Build For Micromax Unite 2](https://blogger.googleusercontent.com/img/b/R29vZ2xl/AVvXsEggBTE1nIlAmJU2xRHnUohbRVjTSEm5NLwttW45KE231R6LhX1urVhlL-2kqiTvxDFOv602EC7xKylRZbccv1o2d_7h1l8eXc9b_Cm9uEhtfk_pUL31w4b_fberlHWcJGjjvAAX10G1O2OY/s72-c/https-%25252F%25252Fraw.githubusercontent.com%25252FXOSP-Project%25252Fxda_thread_template%25252Fmaster%25252Fbanner_images%25252Fxosp-logo+%25281%2529.gif)
![[6.0.1][STABLE][OTA] Resurrection Remix v5.6.8 For Micromax Unite 2](https://blogger.googleusercontent.com/img/b/R29vZ2xl/AVvXsEjgazUgVYfhUx8BRw_h67Lgm5VEmnk9wkgotifkJzQbSBHxg9OzmjhxBRY0ILA4Fn6_WBV66GYbX5QyMI79ckYaZ_q7Y4pS-1CklQVi92U7EFI-HLVIau97Tw4E-r-BwGUOOgiVOCSM77k/s72-c/2016+-+1.png)
![[Latest][STABLE][R72] Resurrection Remix (RR) v5.7.4 r72 for Micromax Unite 2 By Team R.A.M.](https://blogger.googleusercontent.com/img/b/R29vZ2xl/AVvXsEjBMRAhOTS6_TAOLNIHGxB3gu8XasPP5QKEuKk3CYE6S0ZnQuZatDbSLIPydQtuRzMfnVX7RIUqieilgQD4yzT-55DOVggV07uRefrXR4gC5LILYm0Pm3saH4uneV7aU_1s0wiBHpdGh1QX/s72-c/14441048_1847810672108651_6855740913213033405_n.png)
![[P-BUGLESS] Resurrection Remix Final MM v5.7.4 r74 For Micromax Unite 2 (MT6582)](https://blogger.googleusercontent.com/img/b/R29vZ2xl/AVvXsEi5h9L-4UE-Nz5MGy7AxCdvgFkoPCIg16WyPrzcLkm9Nw7-utV5ObdYRpuAUR9ACZKjywgmpDniWr0tU-fYOc4o0DFaC1pmG37hweUvymKx6ujsj577Md0t-MK5H_mqyL5a5bZ8iz1BrVo/s72-c/rr.png)
![[GUIDE][MT6582 - 6592 - 6572] How To Port Cyanogenmod Based Roms For Mediatek Devices](https://blogger.googleusercontent.com/img/b/R29vZ2xl/AVvXsEi_XT2vtLXurMB5I0Suvm23se7852EBqvCZ954F2YWrvpdh_ieI0sEL01-RR3pO8uybyemvJBnv4iqPnD2Y6ScuZ78wq51TpJY5nnvX5Uv1BMeId_ECCwv0RaEyDegg32OYCz6V767ho2M/s72-c/cyanogenmod-rom-galaxy-fame-s6810.jpg)
![[BETA][4.4] MIUI V8 - 6.6.23 China Developer Rom By CPT Reborn](https://blogger.googleusercontent.com/img/b/R29vZ2xl/AVvXsEjN2FGA665fJg0sMPUrU-b78jDREd_FJ1mfzylJ4jUvx5ESFPrF69S8lNG4OUNKOgAnyNwgjdrwm1b-yQKFjti73Z6y_dPHzTfG3LvfuXXHEetZazpiInsgzN9l-JTeOeKnWH89zew2b1LV/s72-c/173447mni04q030imq0iqi.png.thumb.jpg)
![[BUGLESS][AOSP][LP] Liv Ui For Micromax Unite 2 By Team RAM](https://blogger.googleusercontent.com/img/b/R29vZ2xl/AVvXsEiewNLwUiv0KEAzD_WLfpl2Iia__dU2hn6u1s4fnq9Q-Ao7Z3WVo8a0SpzqK-hJZPbFDrLoeVao9ZOMC5gtBYd2qKN0Igyh8L40nFbNJ3_Jq6agKMtfzd2-sM1GyBxIGBB1Pzgb-ps18lLM/s72-c/unnamed.jpg)
![[CM 13][SEPT BUILD] CM 13 FOR MICROMAX UNITE 2 BY R.A.M.](https://blogger.googleusercontent.com/img/b/R29vZ2xl/AVvXsEj5_bz7CrmFjx8b3QeSpumo9szISTvFiGuF0M2Wq3bdHhL8P-NIoxpl63ZyUhKsaZIomhwqXZDMEi-C8ZukFGT2CwSvwq5qSlaFrdrpMr6qPrL8i7p9uiLmYSCgaYKqGgkcuXEdy0fL0cy9/s72-c/Cyanogenmod-13.jpg)
![[BUGLESS] MIUI 8.1.1 Global Stable MultiRom For Micromax Unite 2](https://blogger.googleusercontent.com/img/b/R29vZ2xl/AVvXsEiEJ3knr-j1cAmQyswc7A-8DToOz4dEY7tV83hqzumJGsft2FrWbWNW-7AUfUCUh-P4z2_ERIusQhZ4JlhrDDVuqB1l8Sw3V3Qd8vvks0mg-7Vespnhjyykn_gcjLI797lO9jnIq3v95RXr/s72-c/Screenshot_2017-01-25-18-13-48-620_com.android.settings.png)


**This Content Belongs to highonandroid.com**
Hello everyone !!!
Today i will be explaining How to Backup All Apps including their Data in Titanium Backup.
I will also explain how to restore the backup.
You Need :
Micromax Unite 2
Rooted Phone
Titanium Backup (Download it from Play Store)
Let's Start :
Step 1) Open Play Store and search for “Titanium Backup” and install it.
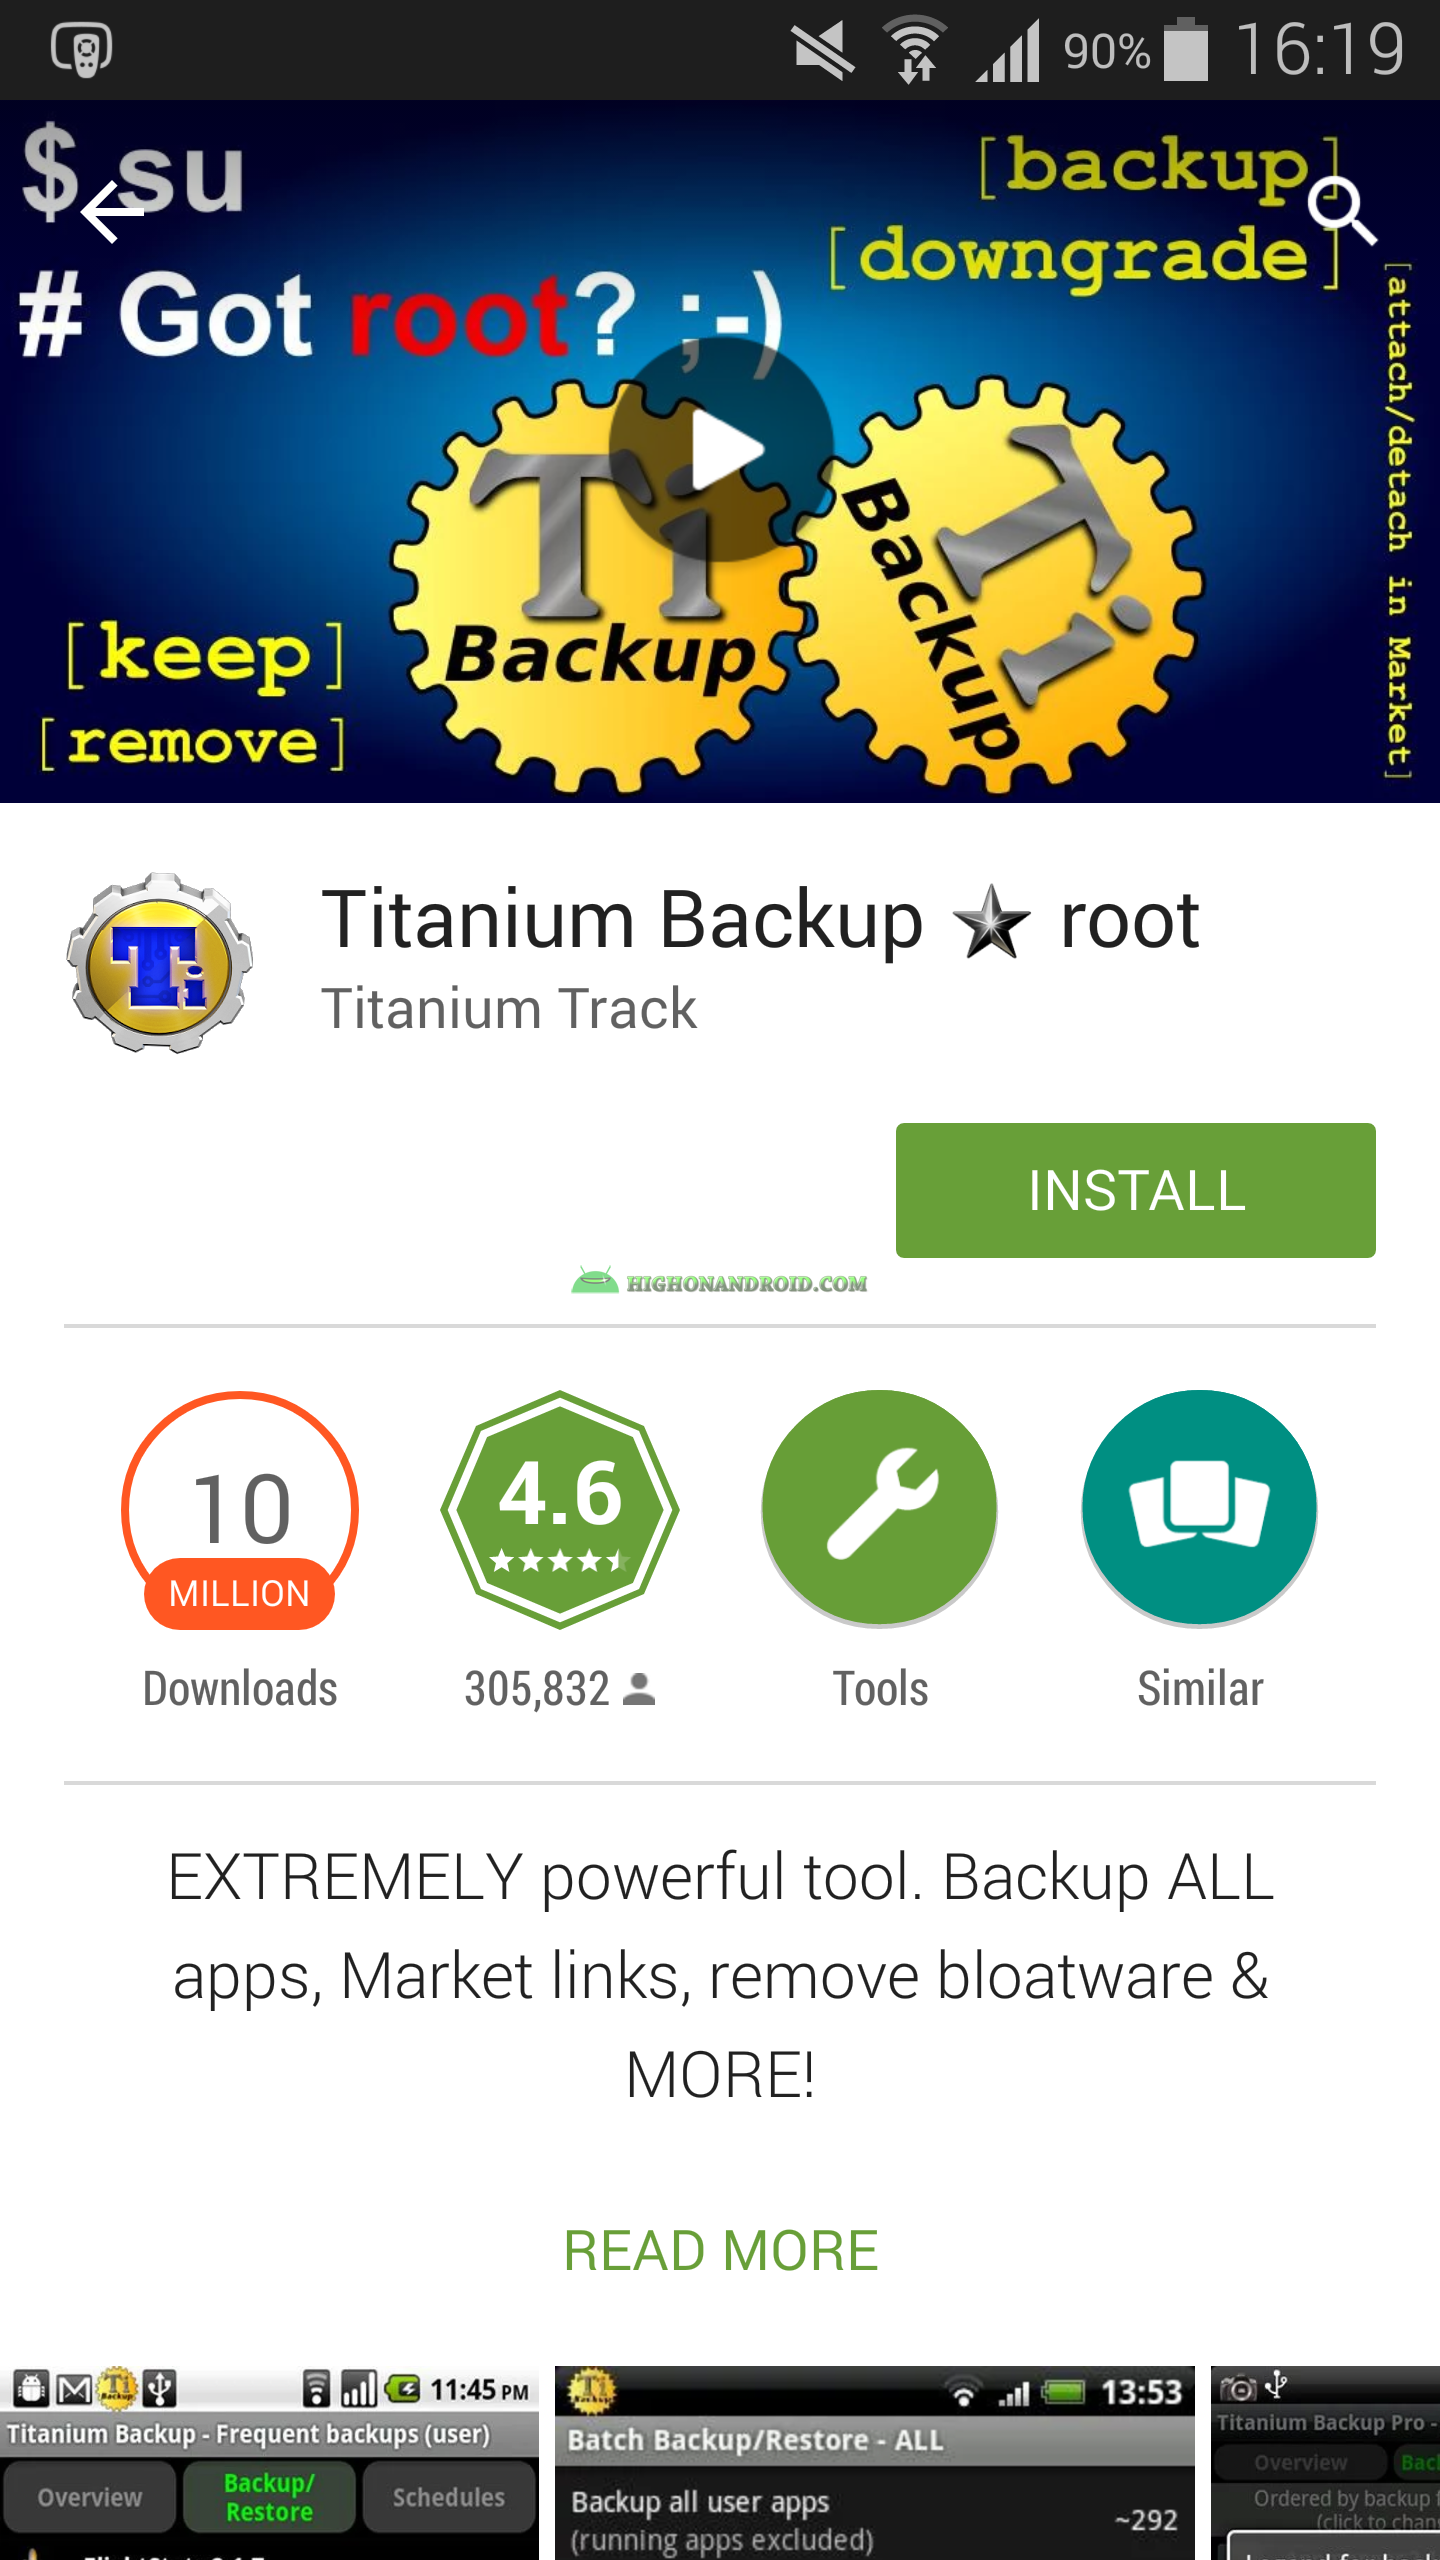
Step 2) Open the app.
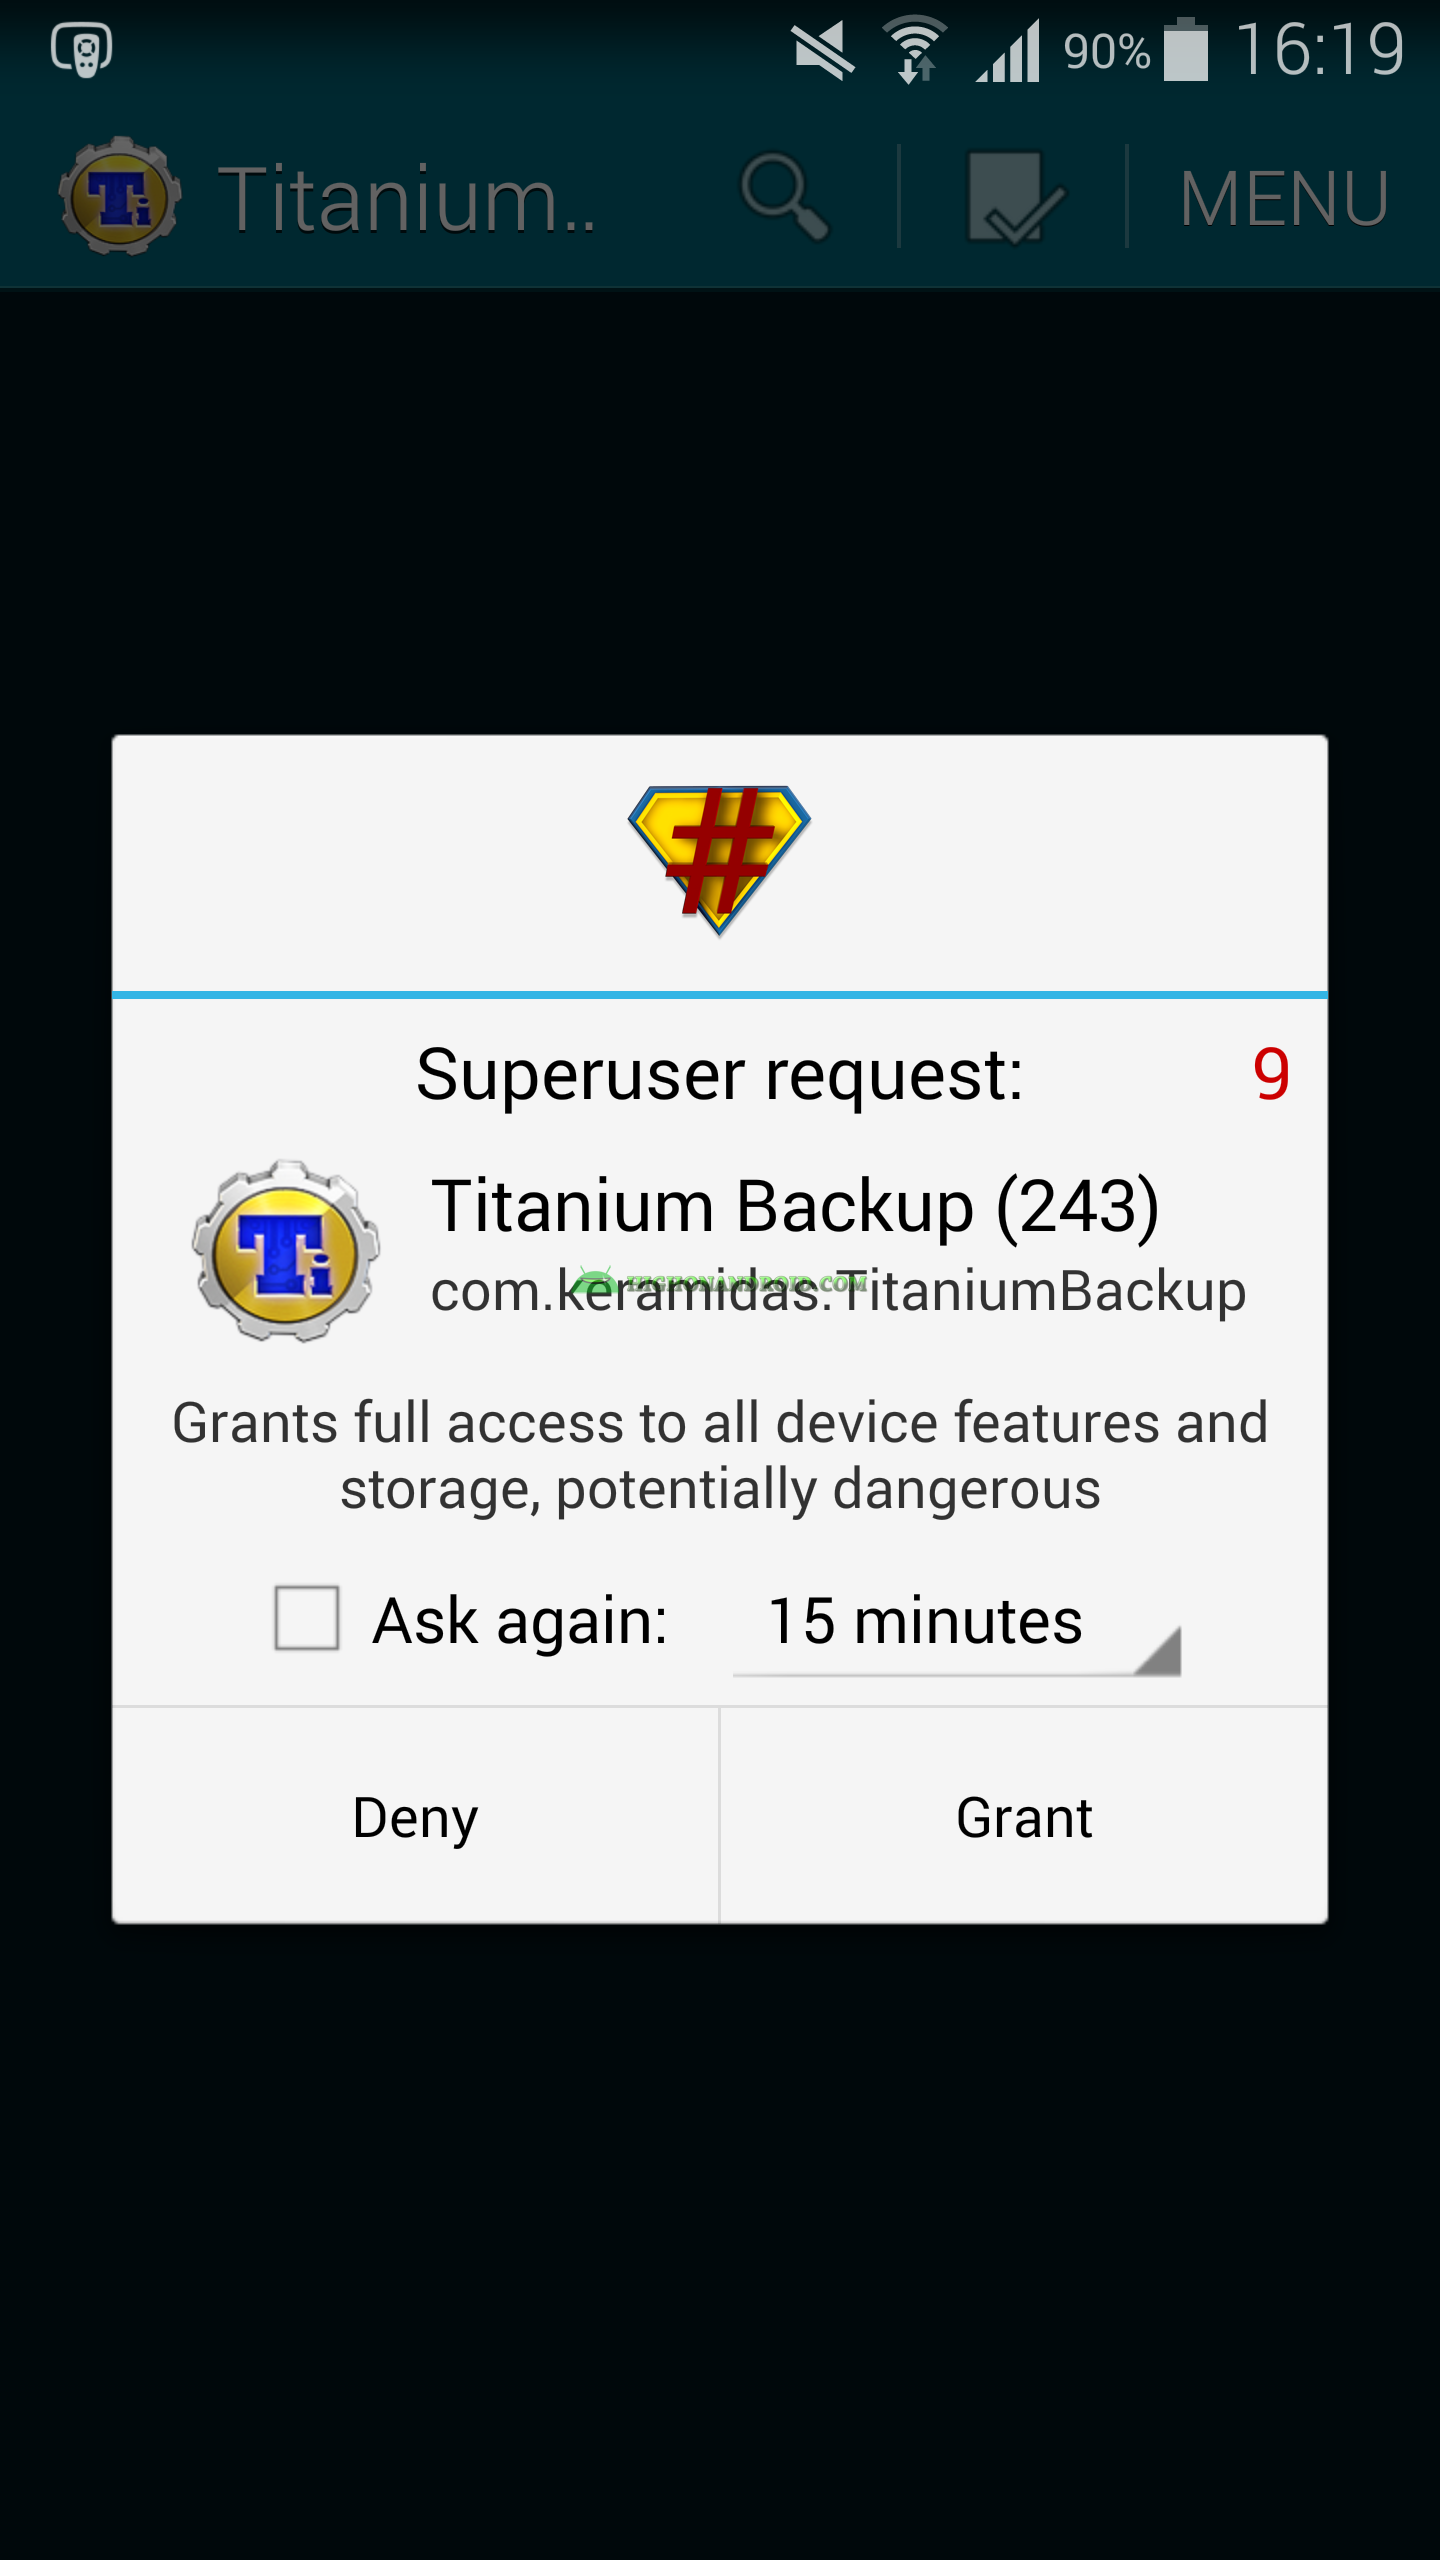
Step 3) The app will ask for root permission and you should grant it.
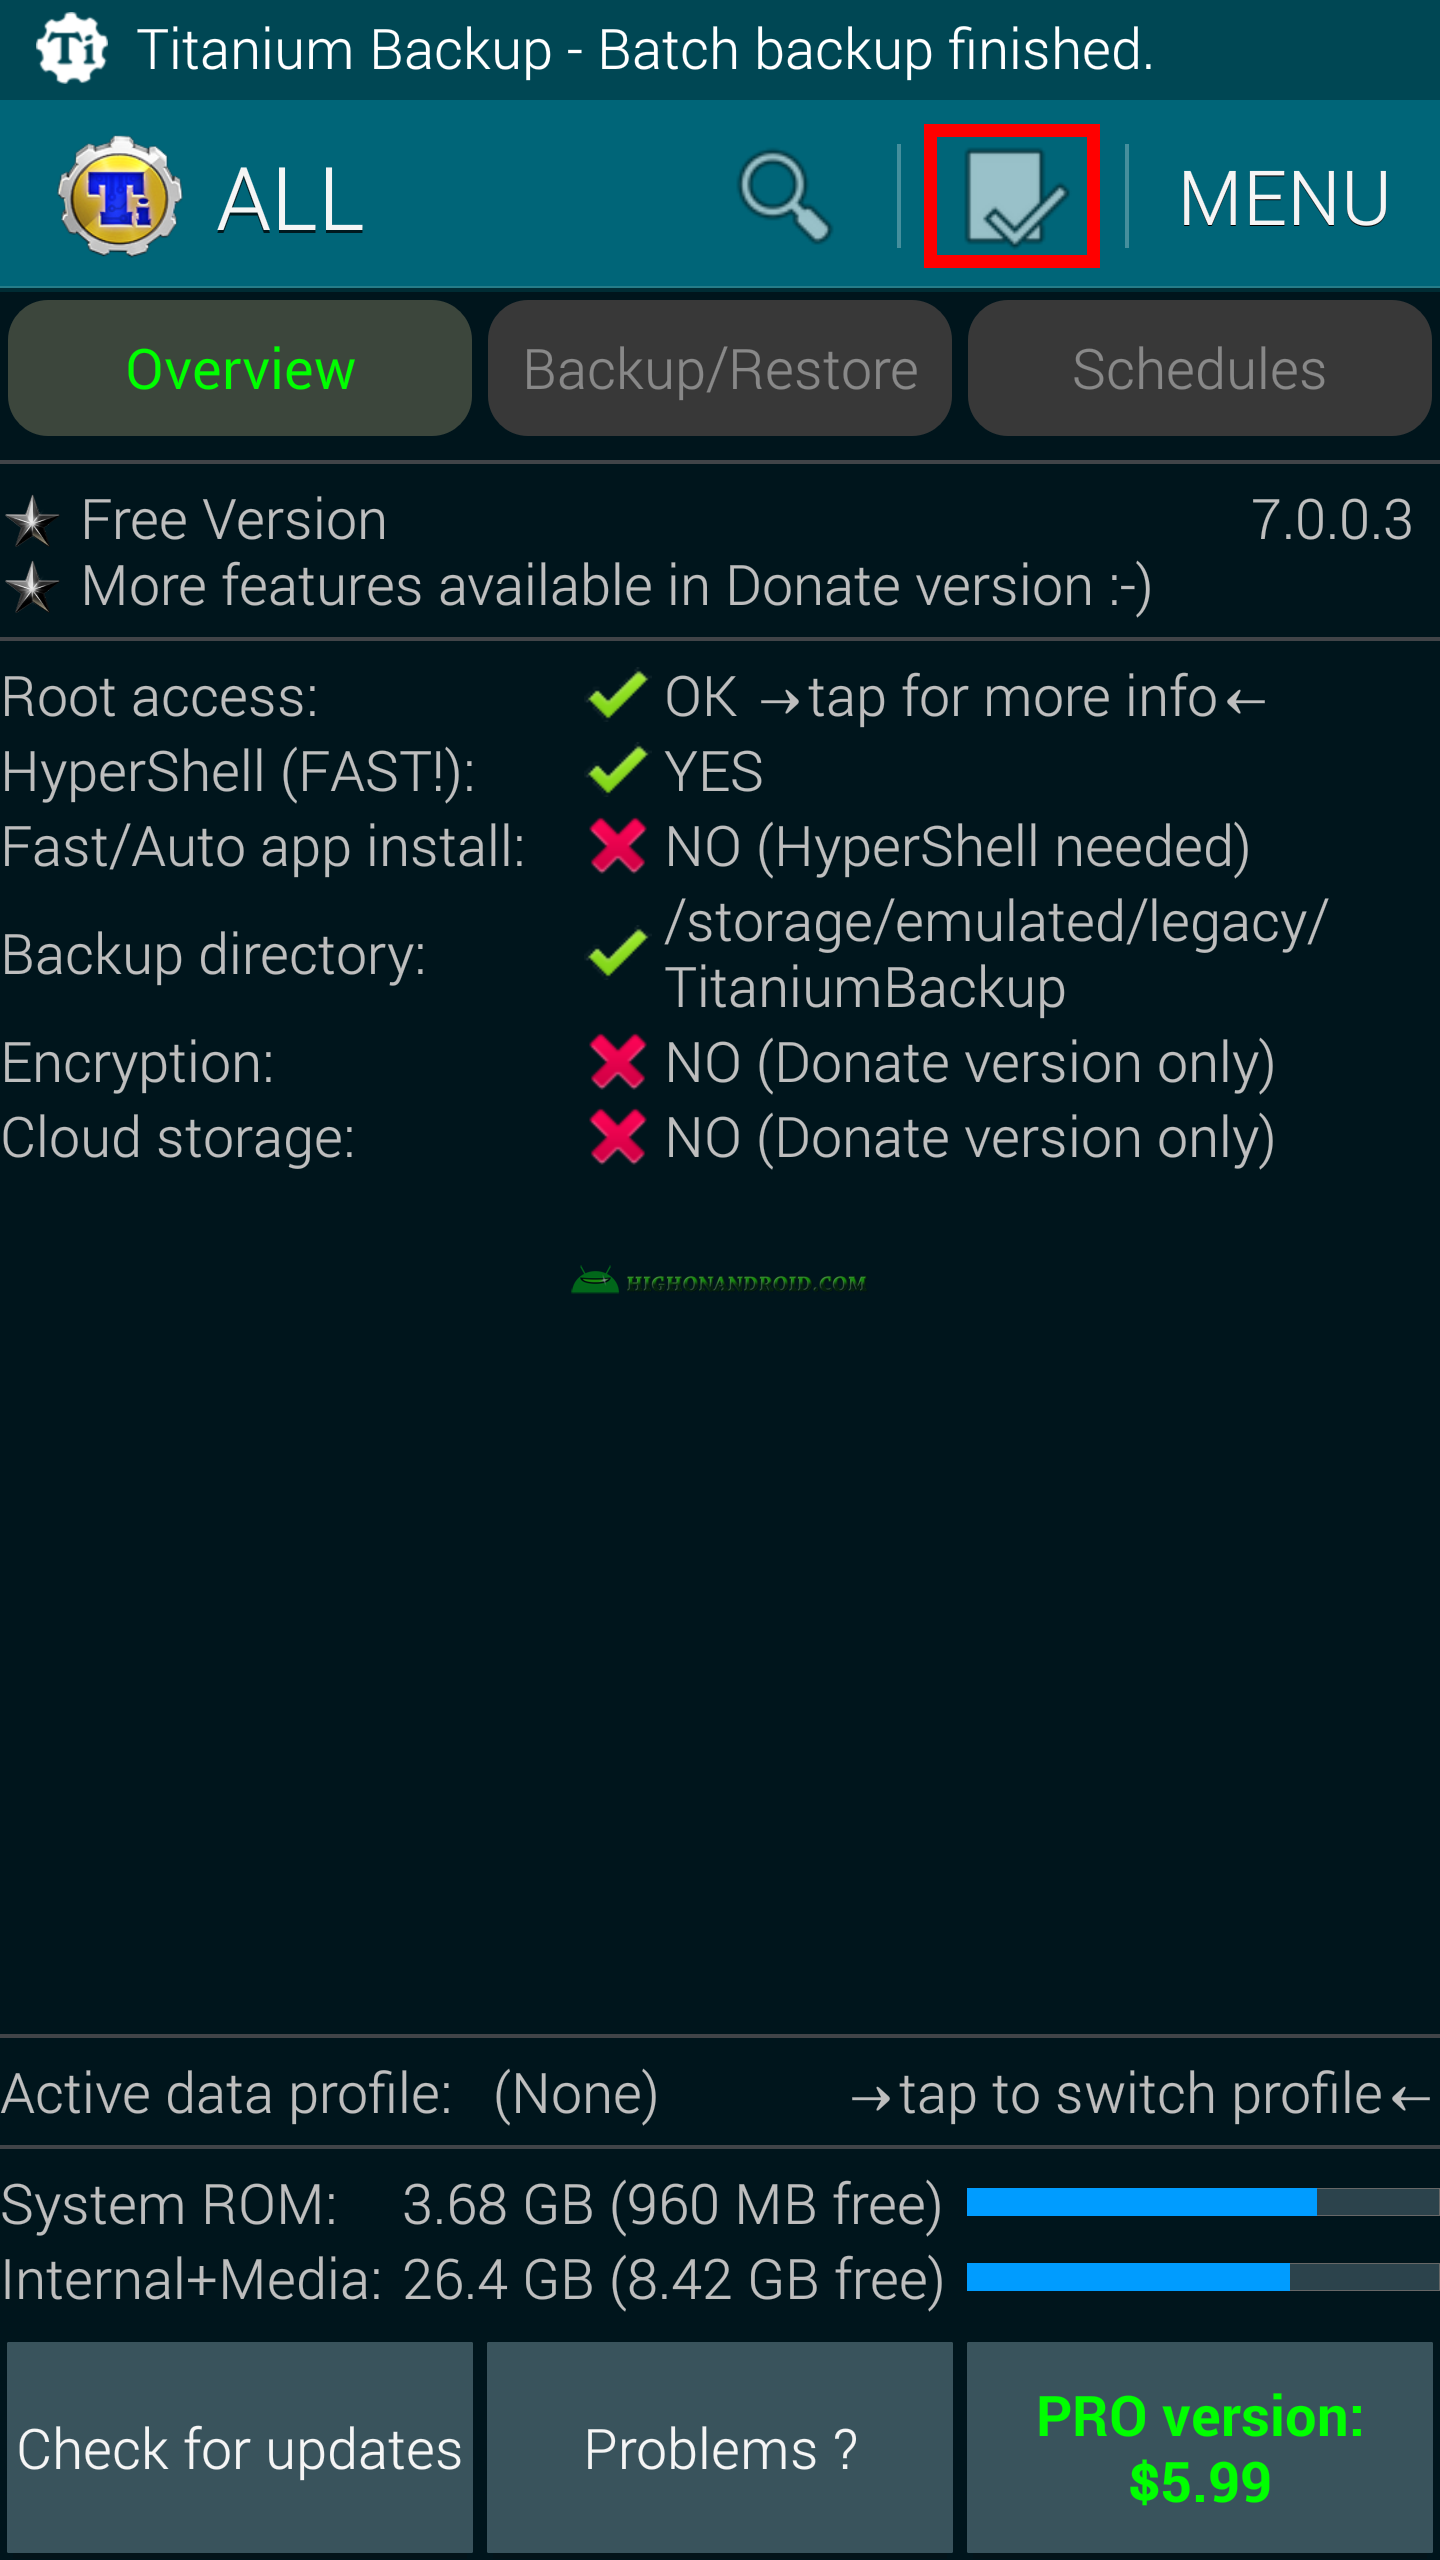
Step 5) This is the main screen of the app.

Step 6) Tap on the check sign at the top right corner of the screen.
Step 7) The following screen will open up, giving us several backup and restore options.
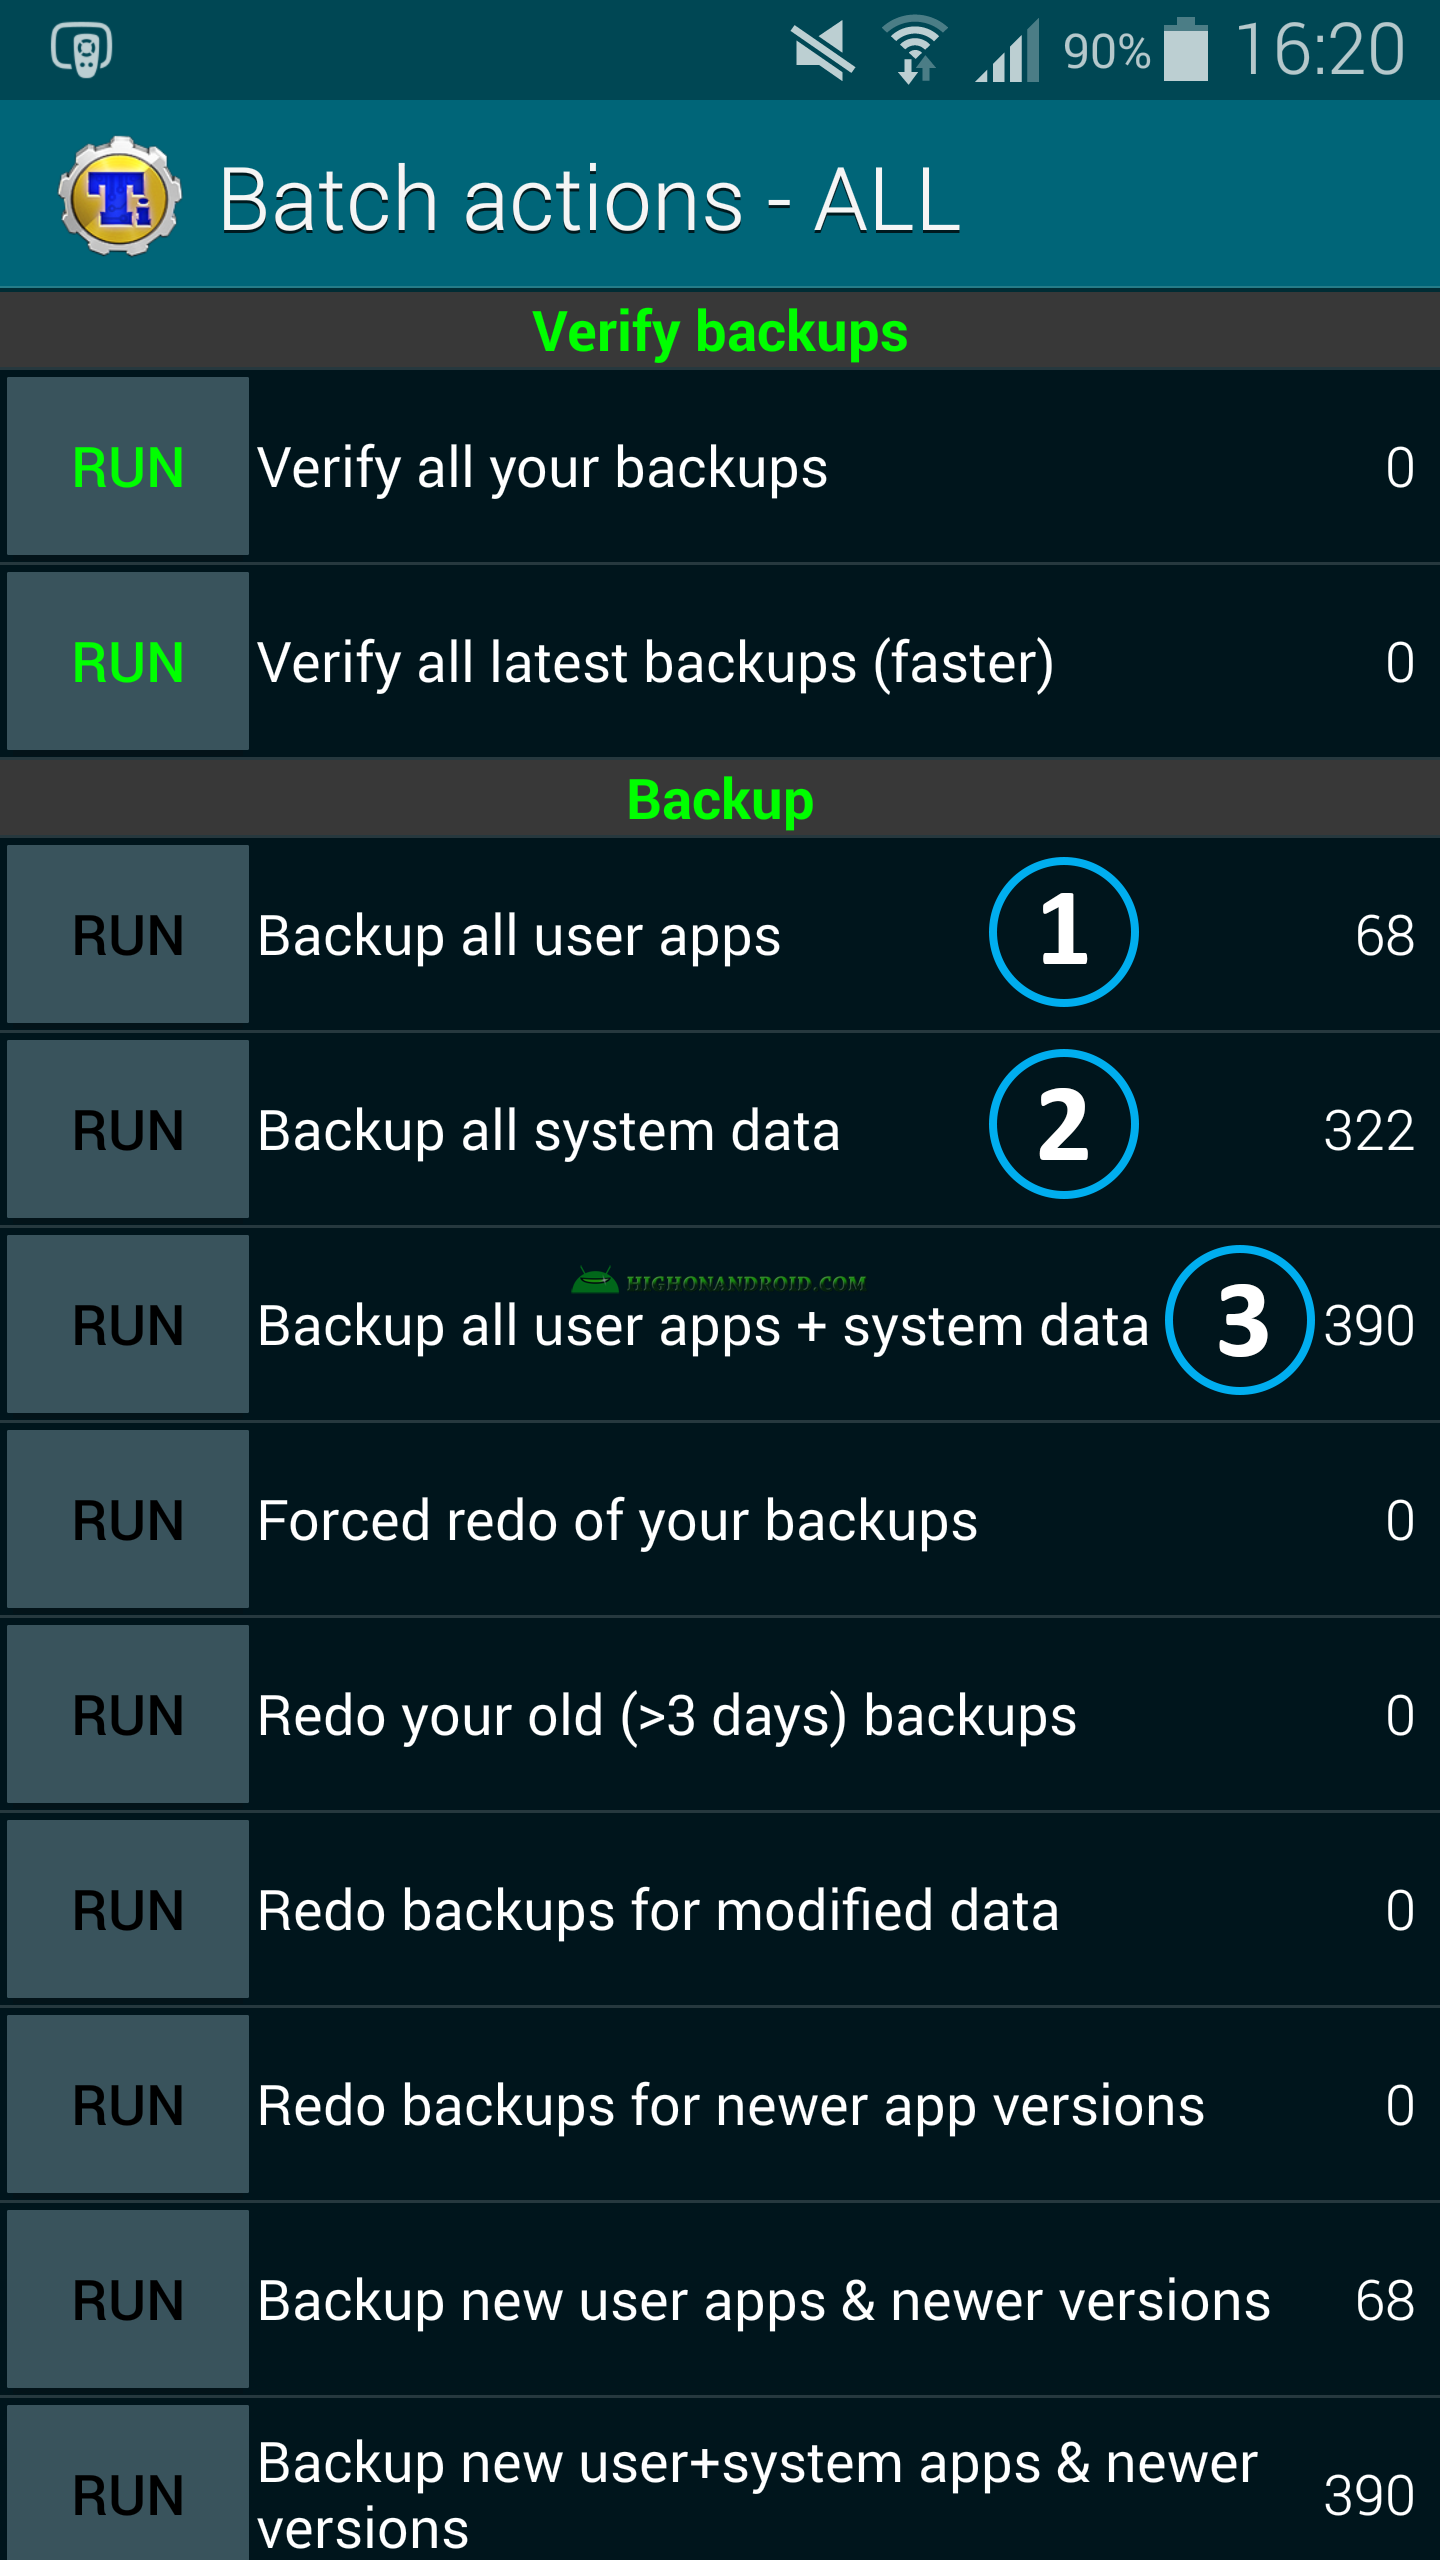
No.1 will backup all installed (user) apps (with data).
No.2 will backup all system apps (with data).
No.3 will backup both installed apps and system apps + their data.
Step 8) For the purpose of this tutorial, we’ll only backup installed apps.
Step 9) The following screen will open up which shows number of installed apps that we have.
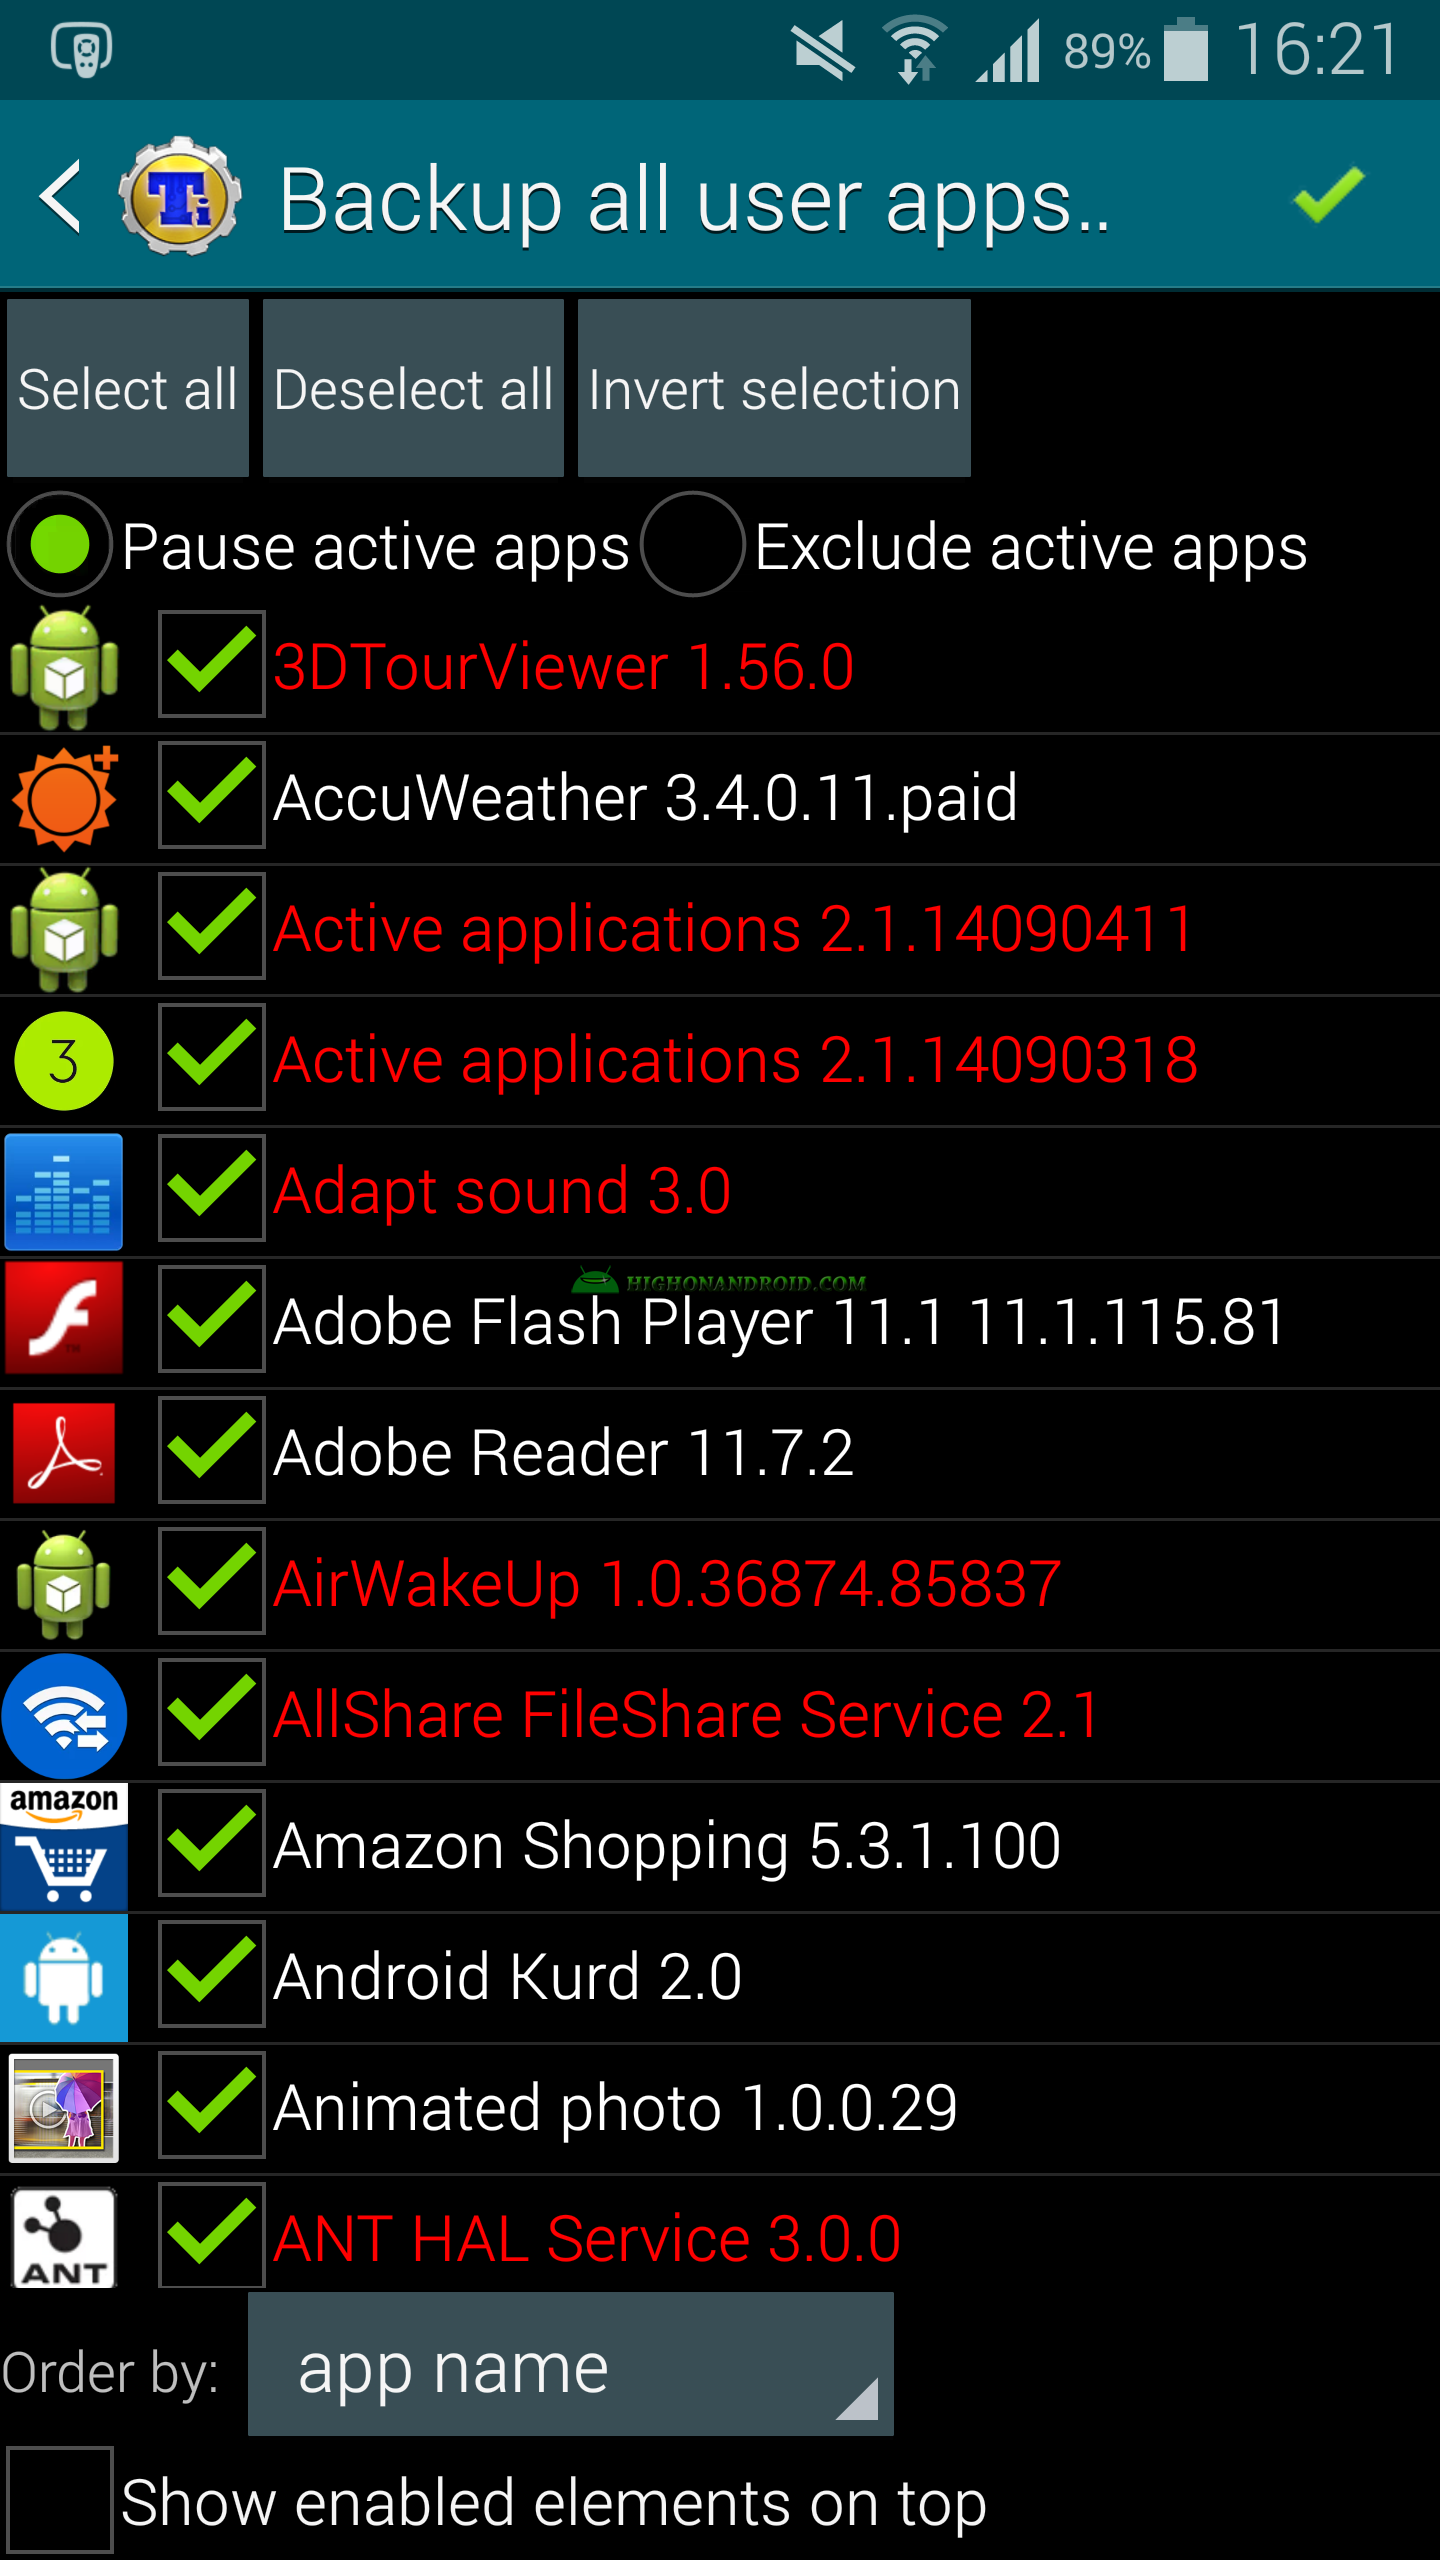
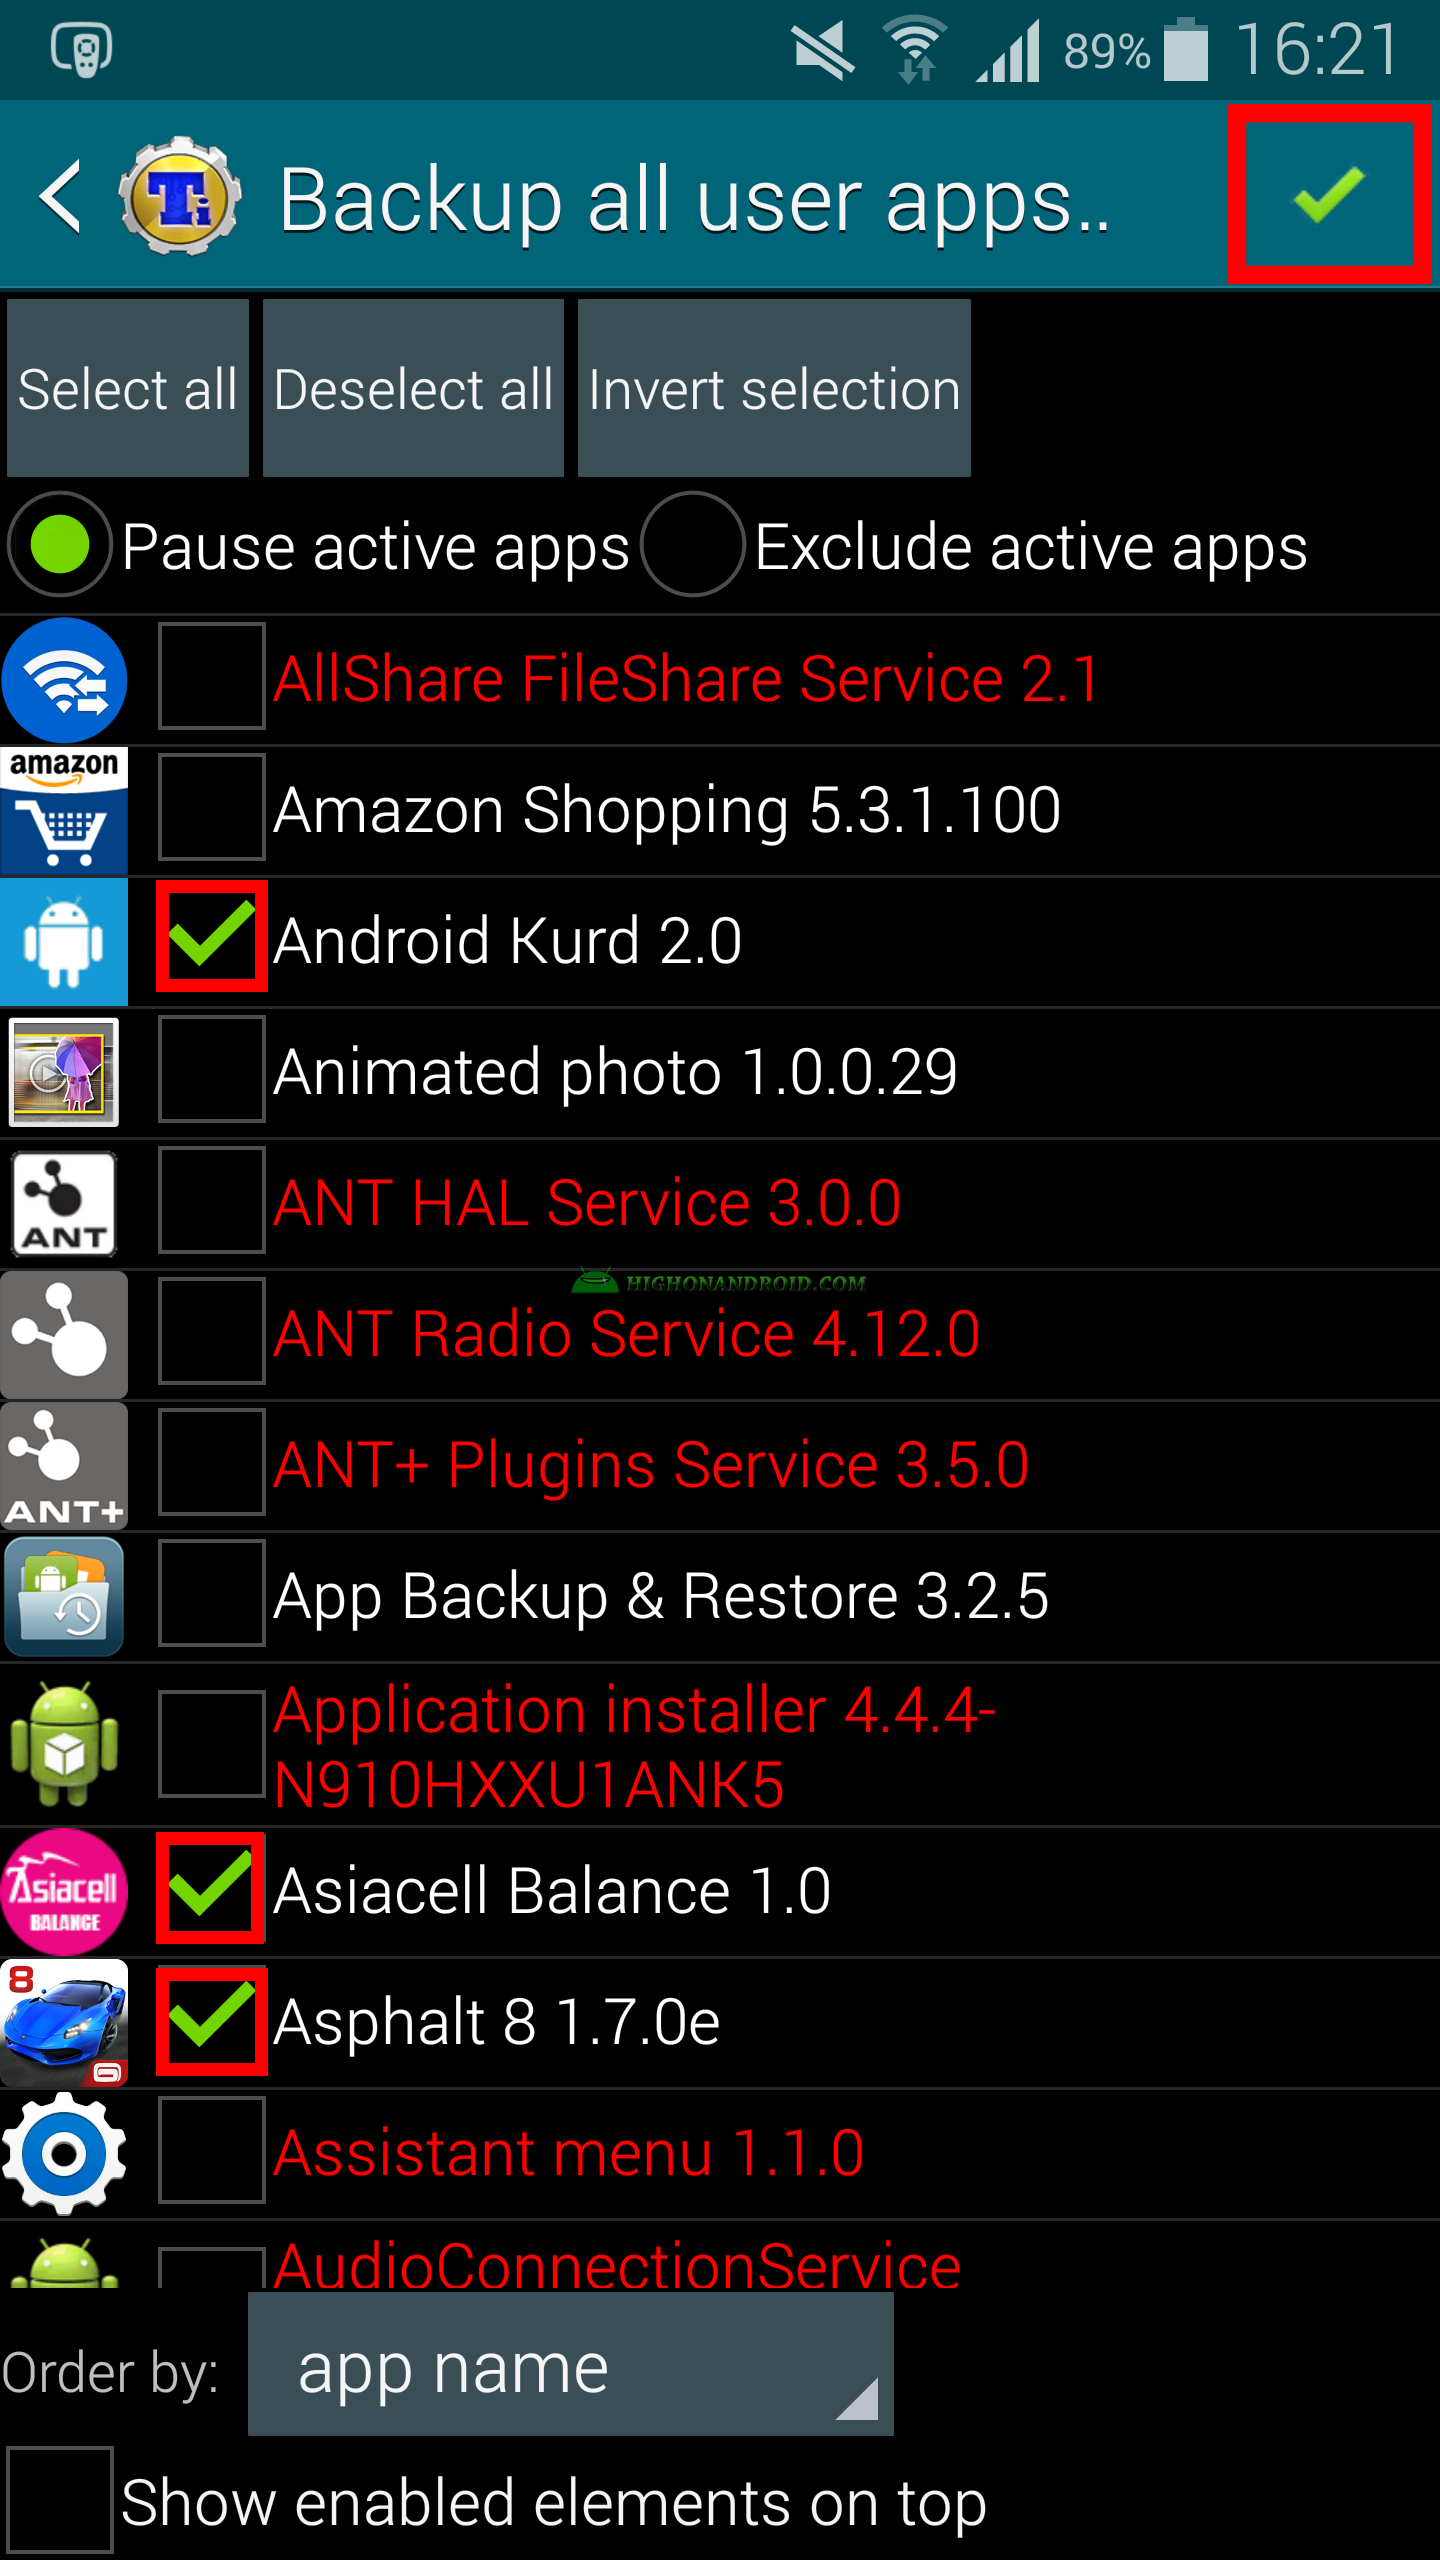
Step 10) We can either select all apps, or select only specific apps that we want to backup.
Step 11) When we’re done selecting apps, we tap on the check sign button at the top right corner to start the backup process.
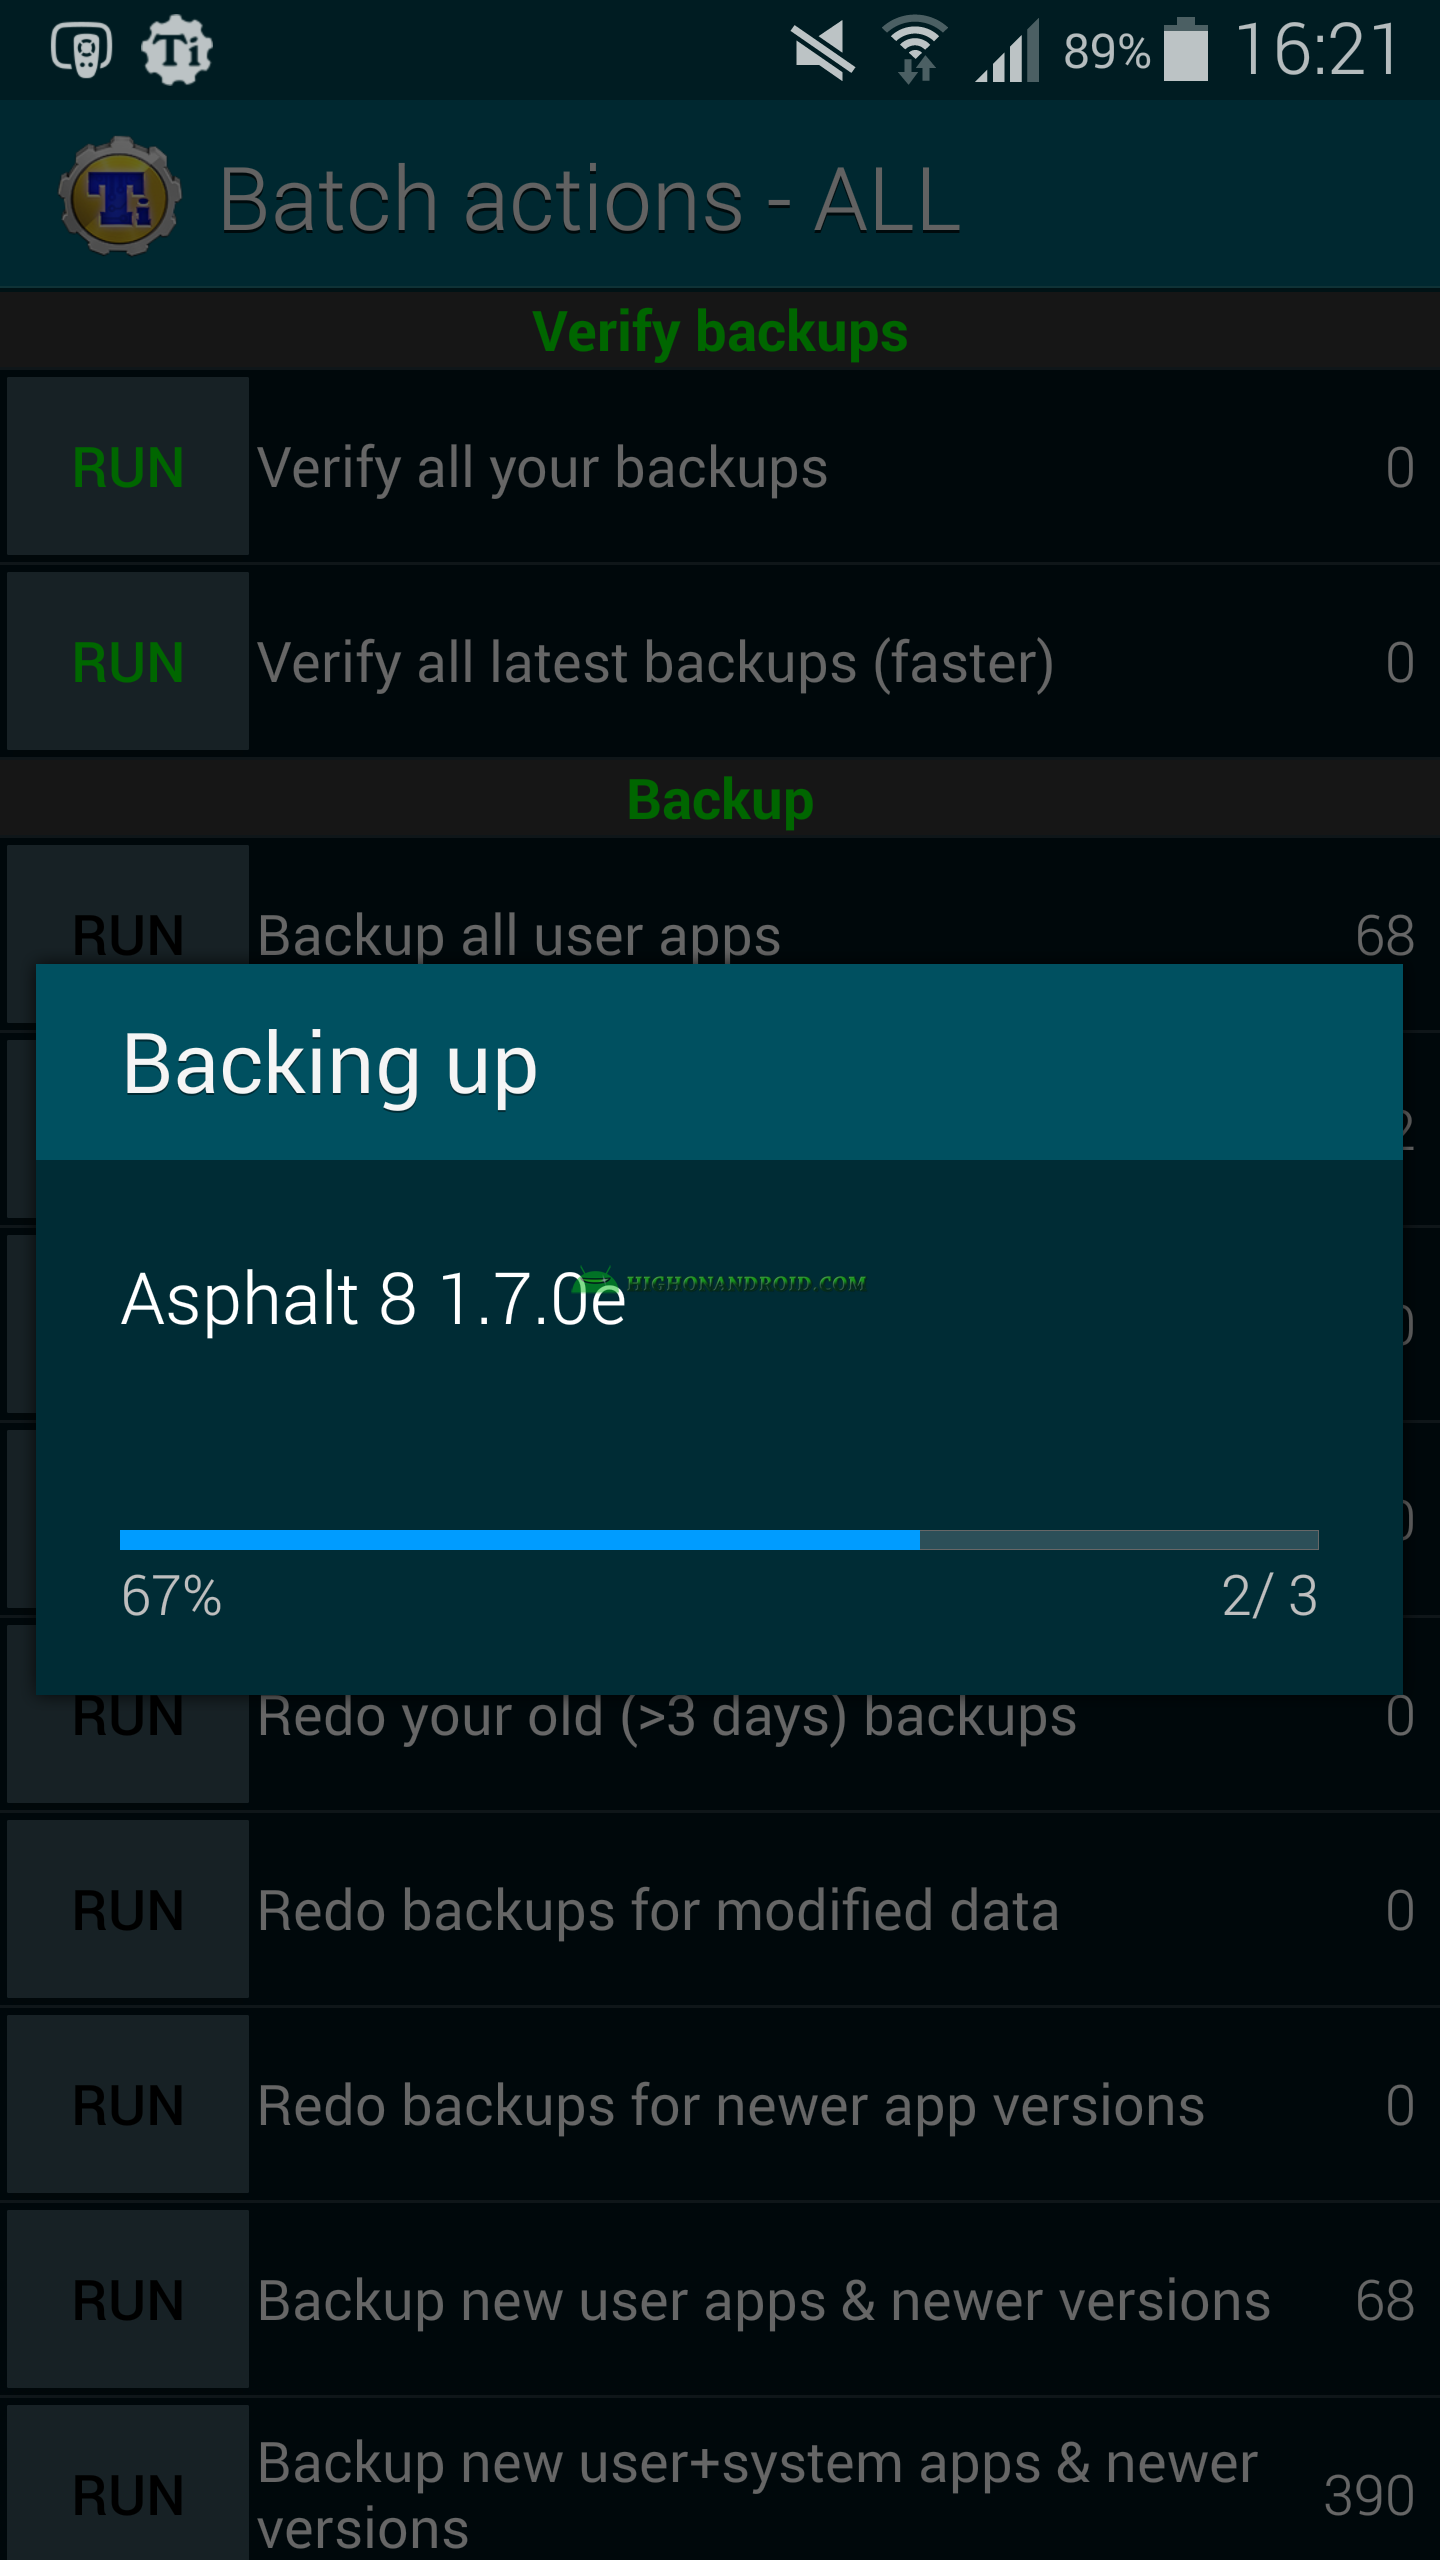
Step 12) The backup process will start. Based on the amount of the apps that you want to backup, the process will take some time.
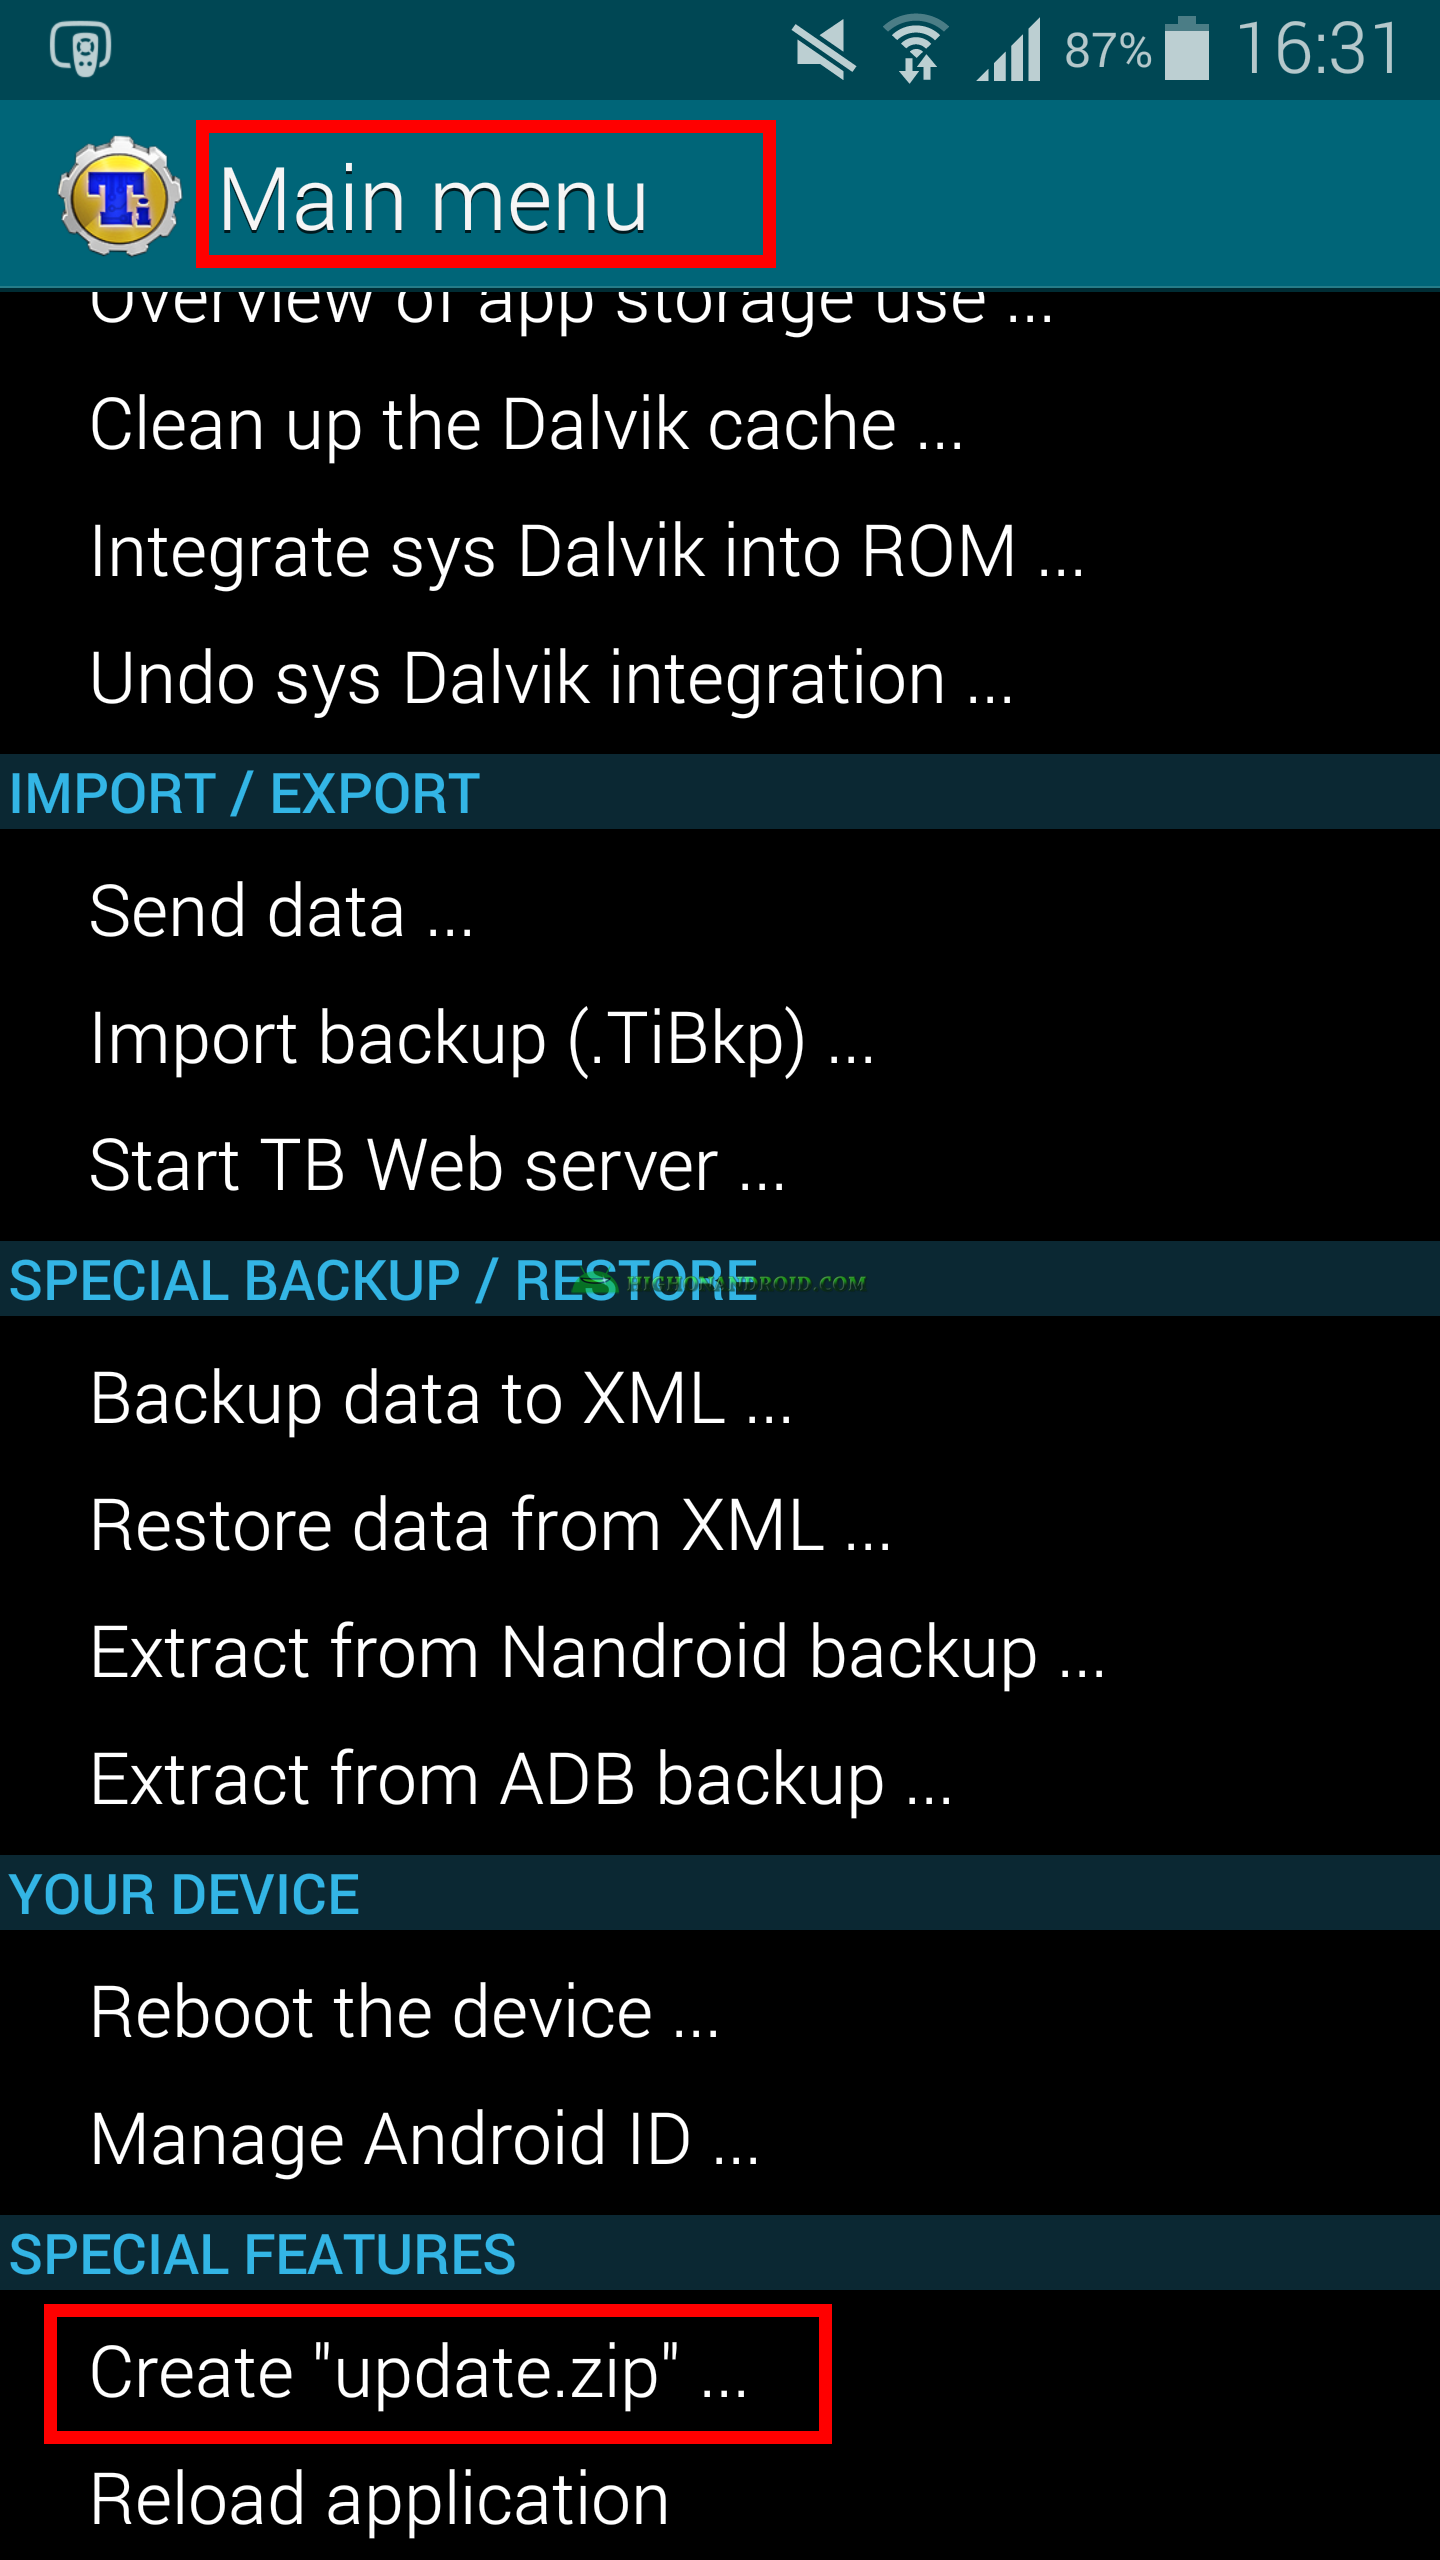
Backup using Update.zip (Advanced)
Note:We can also create “Update.zip” file of the backed up apps so that we can flash it via Recovery (CWM or TWRP) any time we want (MENU > Special Features > Create ”update.zip”. But this feature is only available on PRO version of the app, we highly recommended by the way, most flasholics have this in their app drawer.
The below screen will show up, here we can choose the following:
1. Scripting type.
2. Whether to install the apps as user apps or as system apps (normally user apps can be uninstalled but system apps can’t unless you have root access).
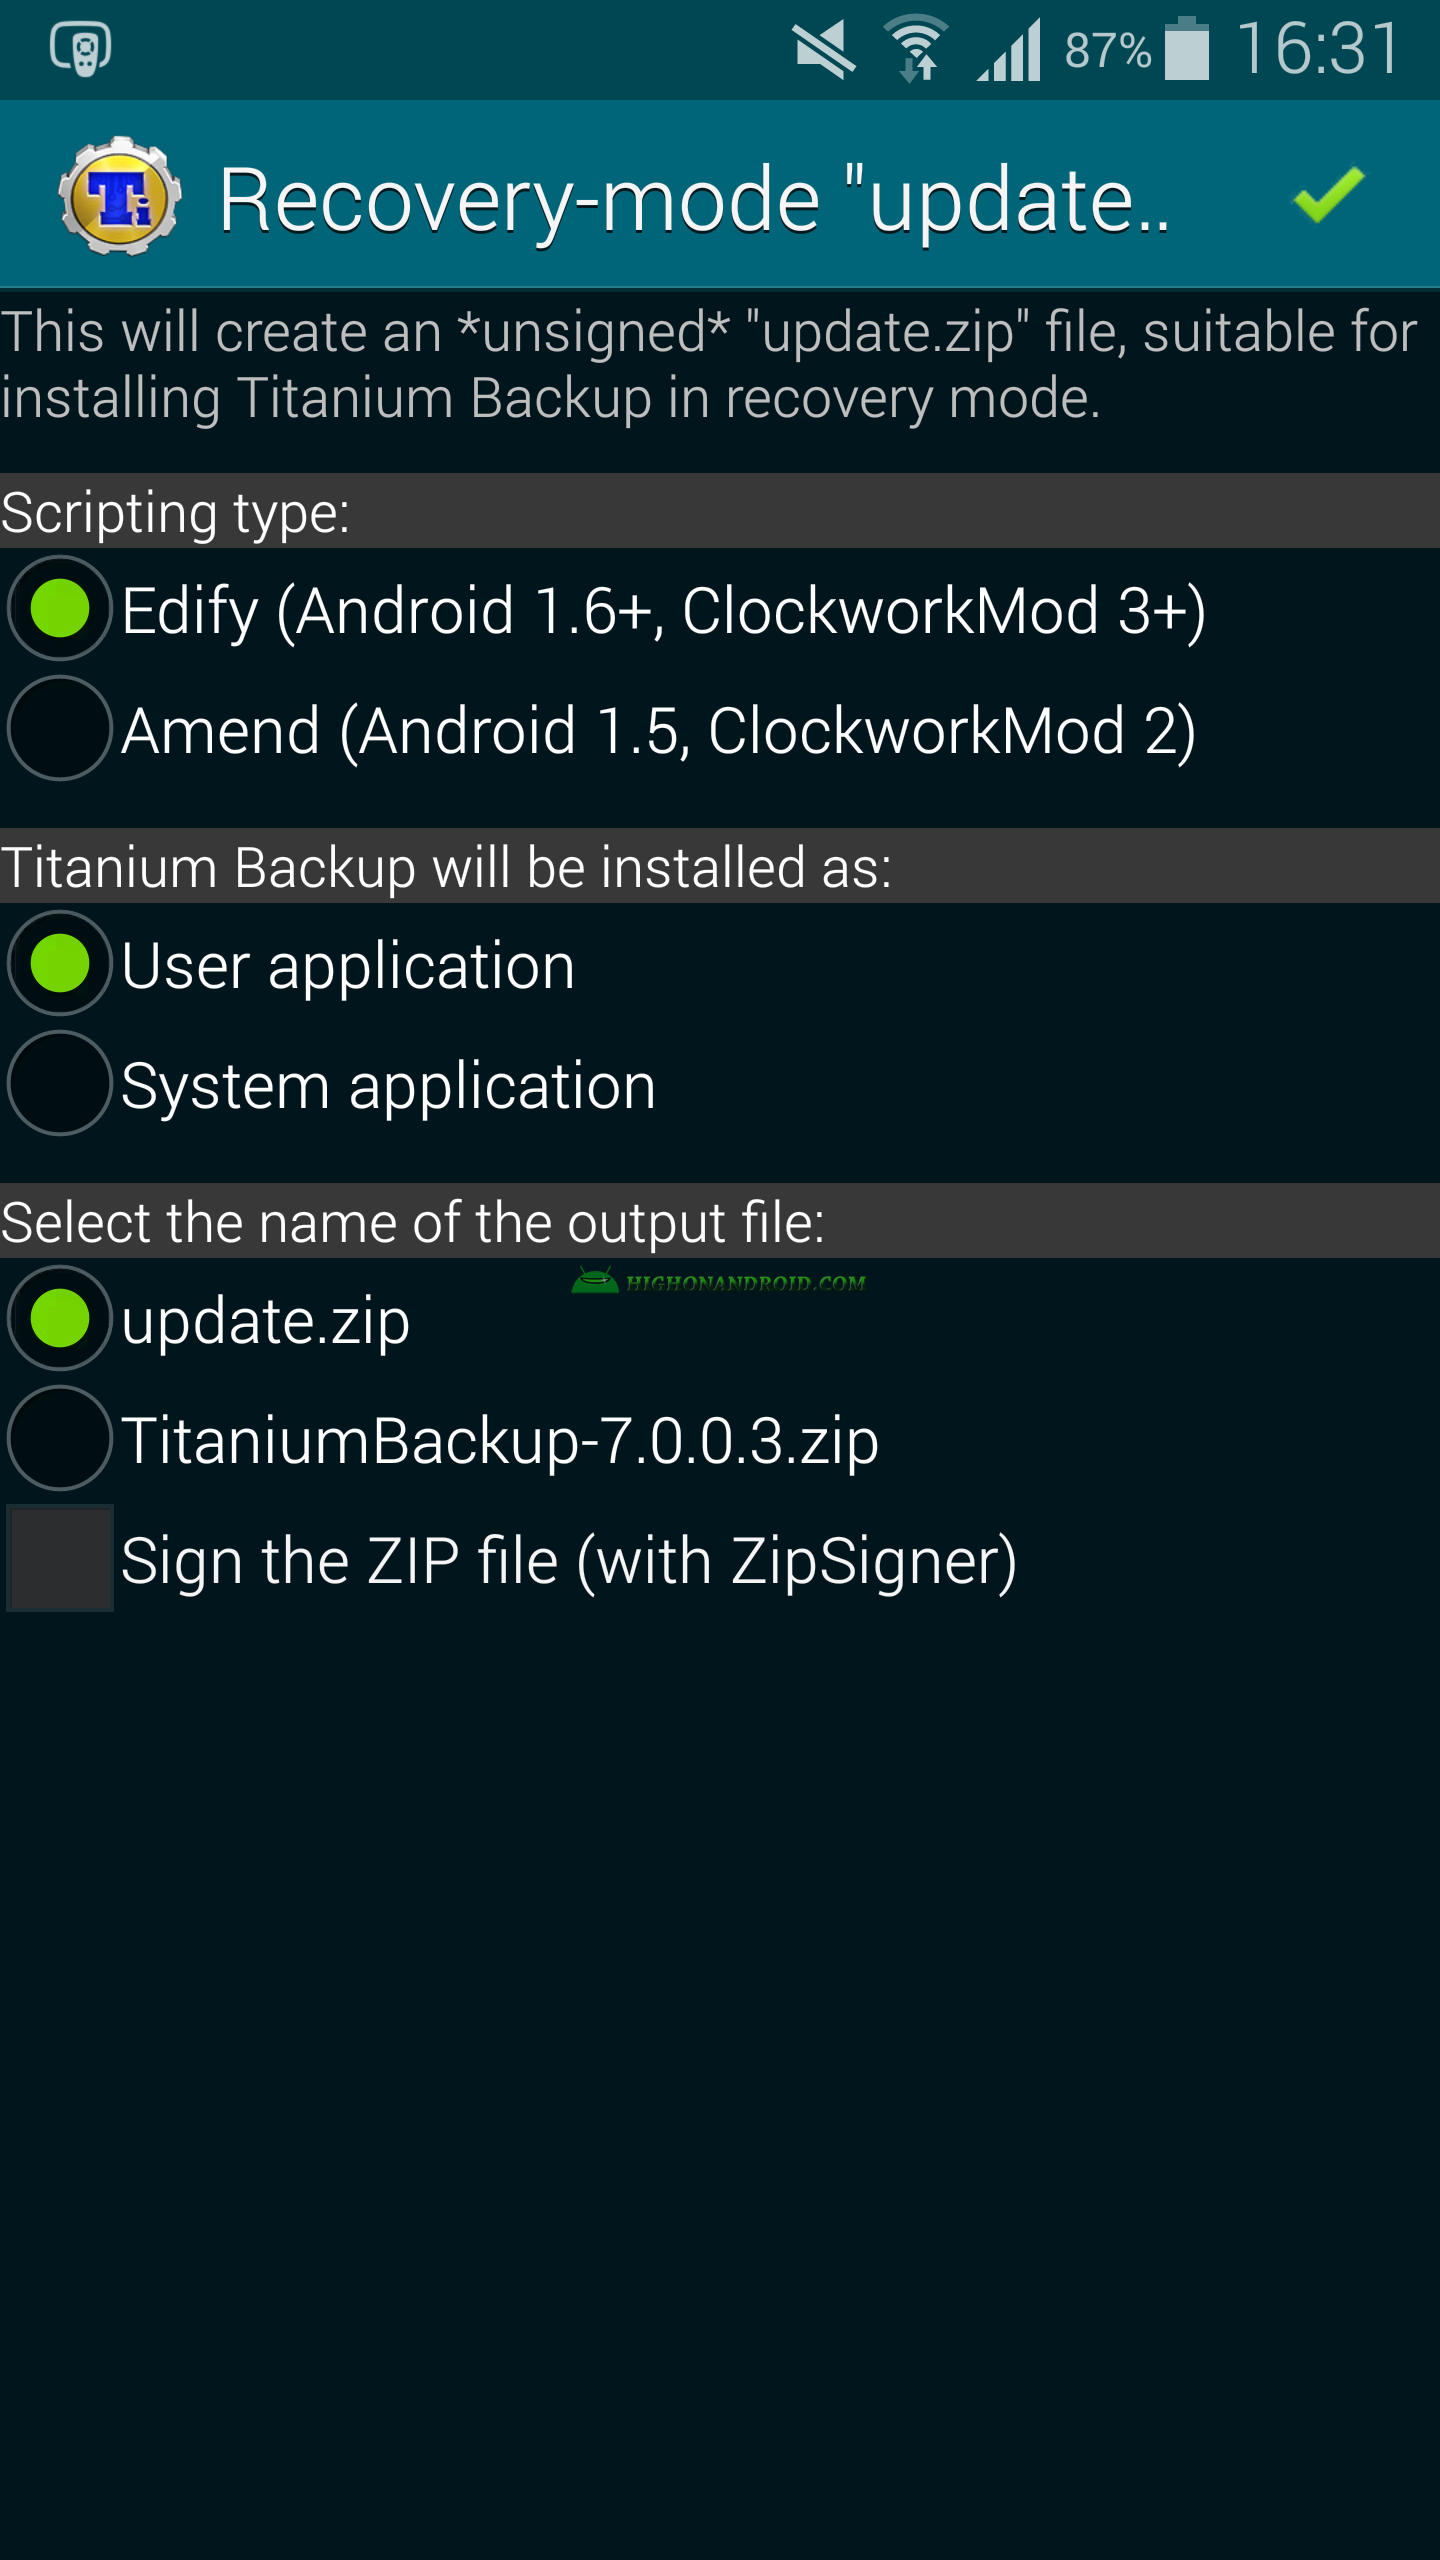
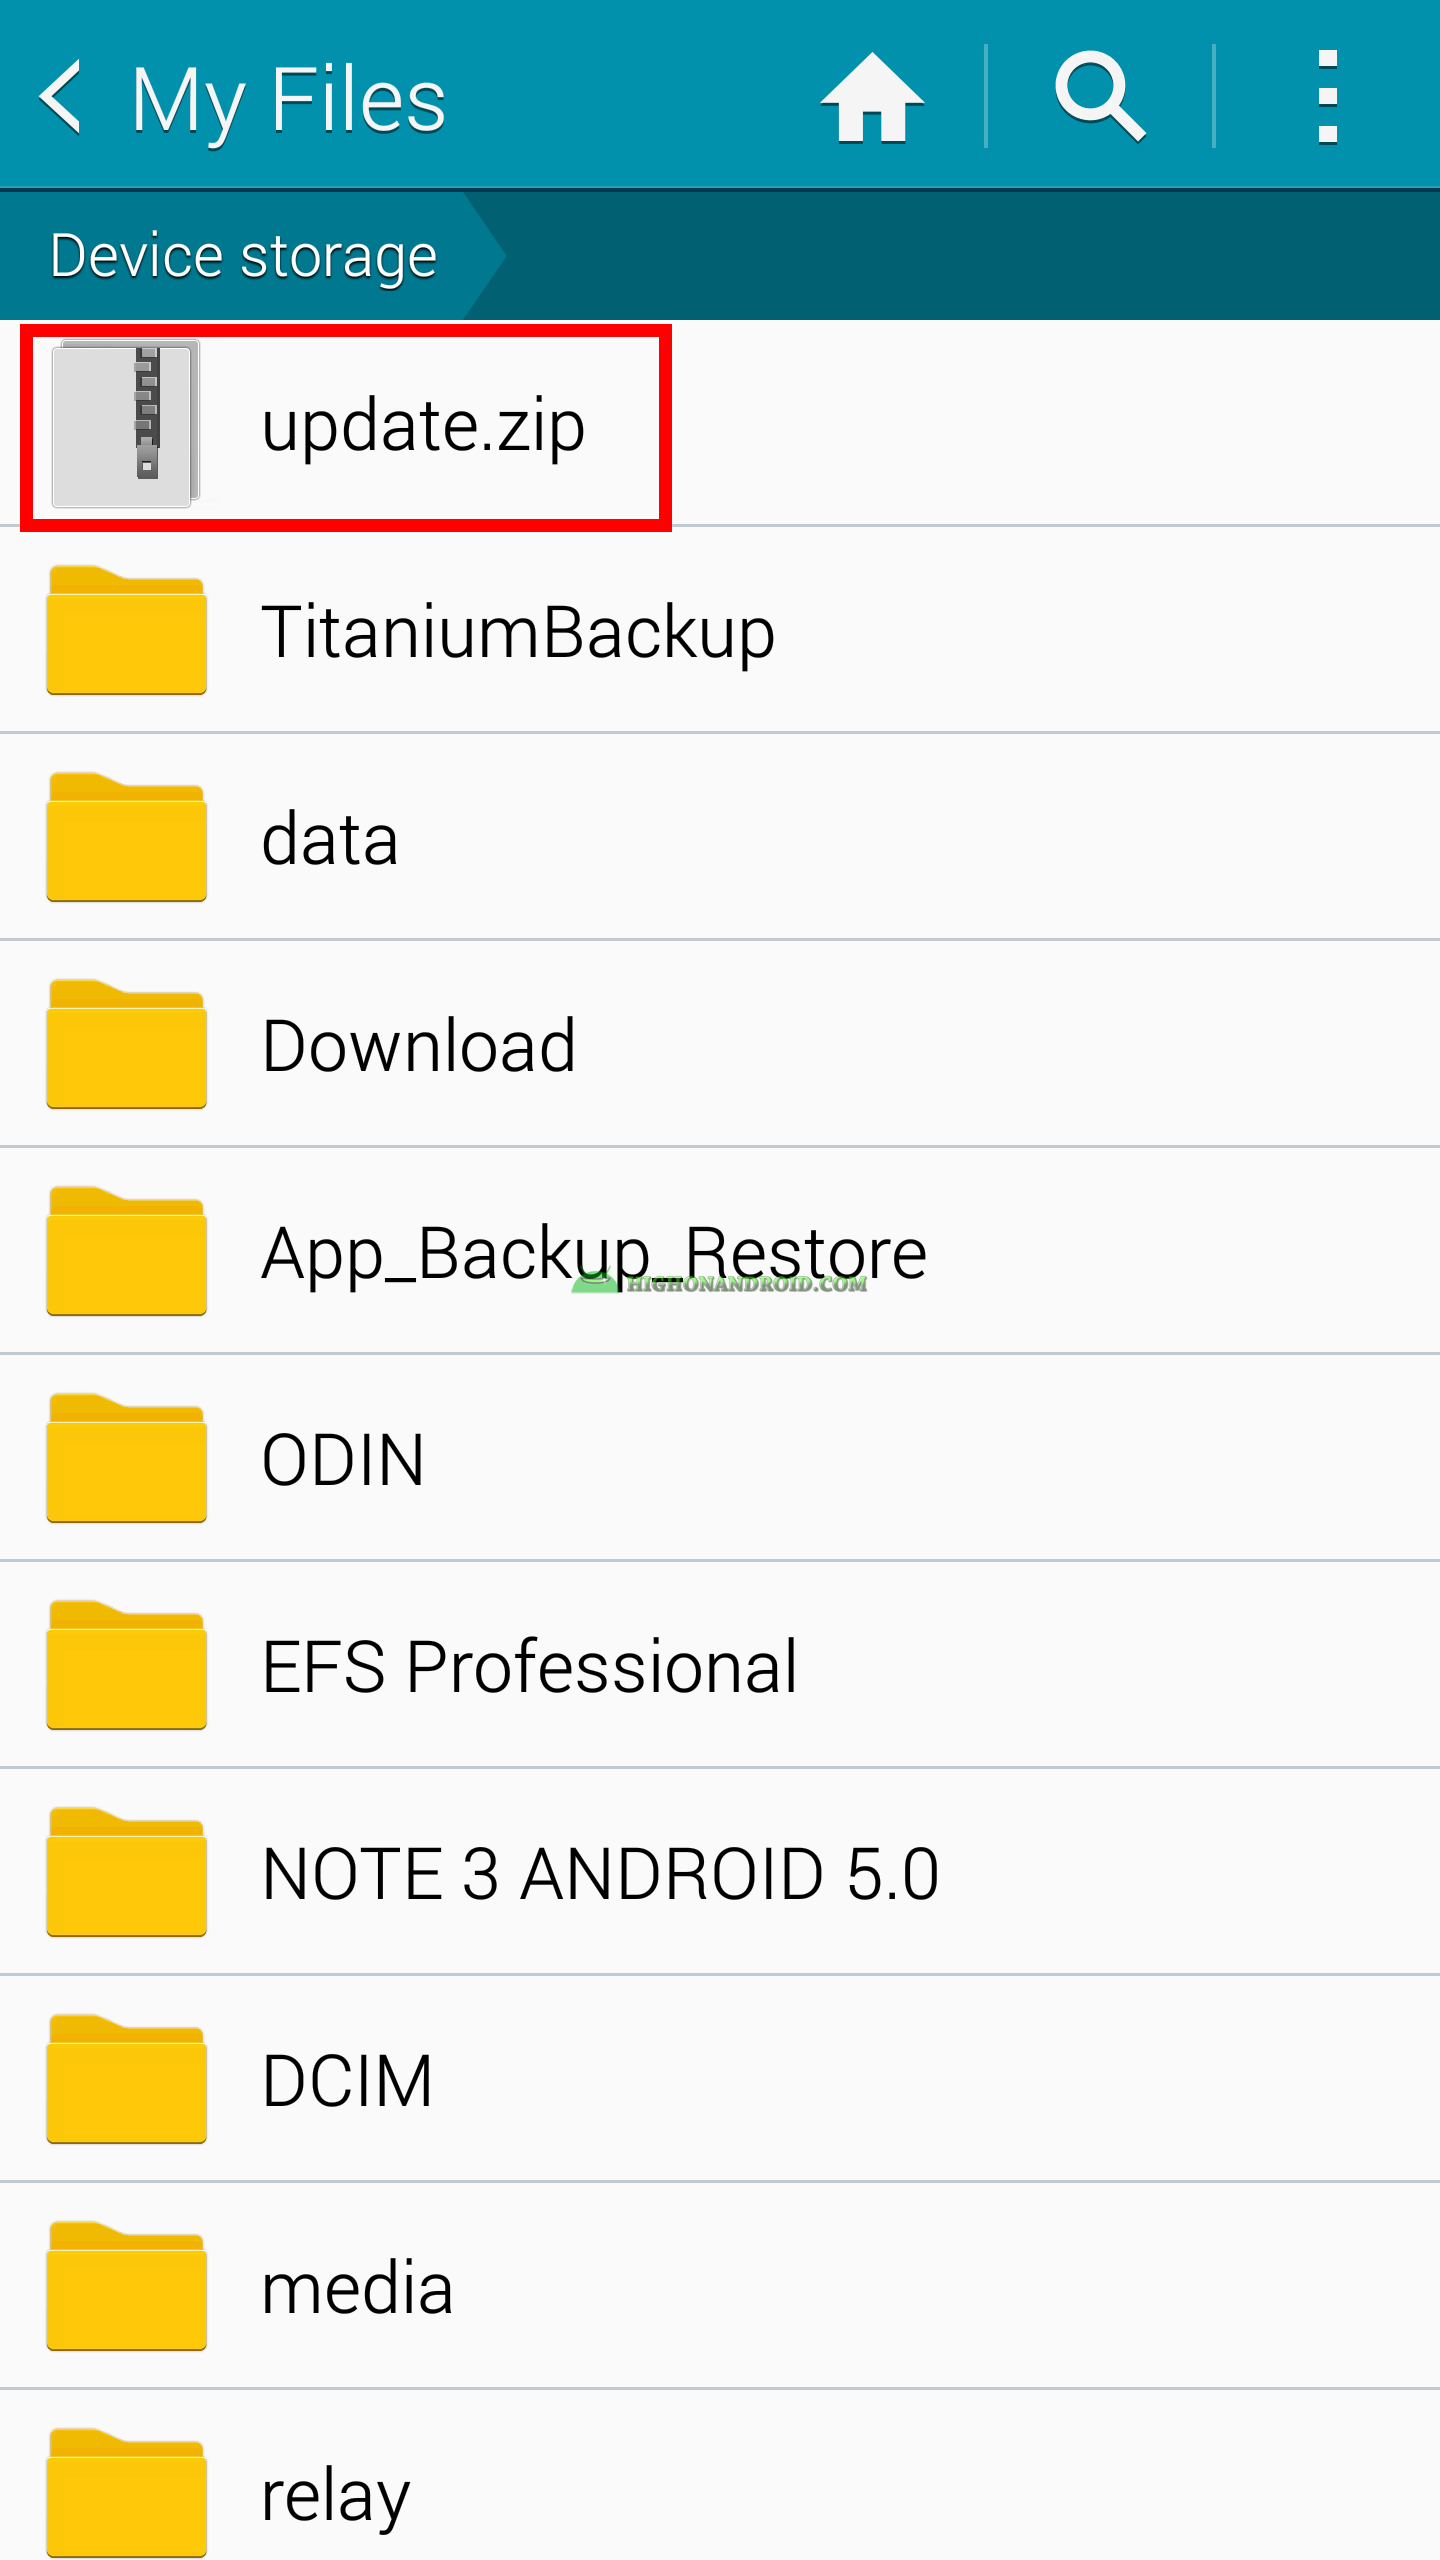
When the process is done, the “update.zip” file will be made inside the root of the phone’s external storage.
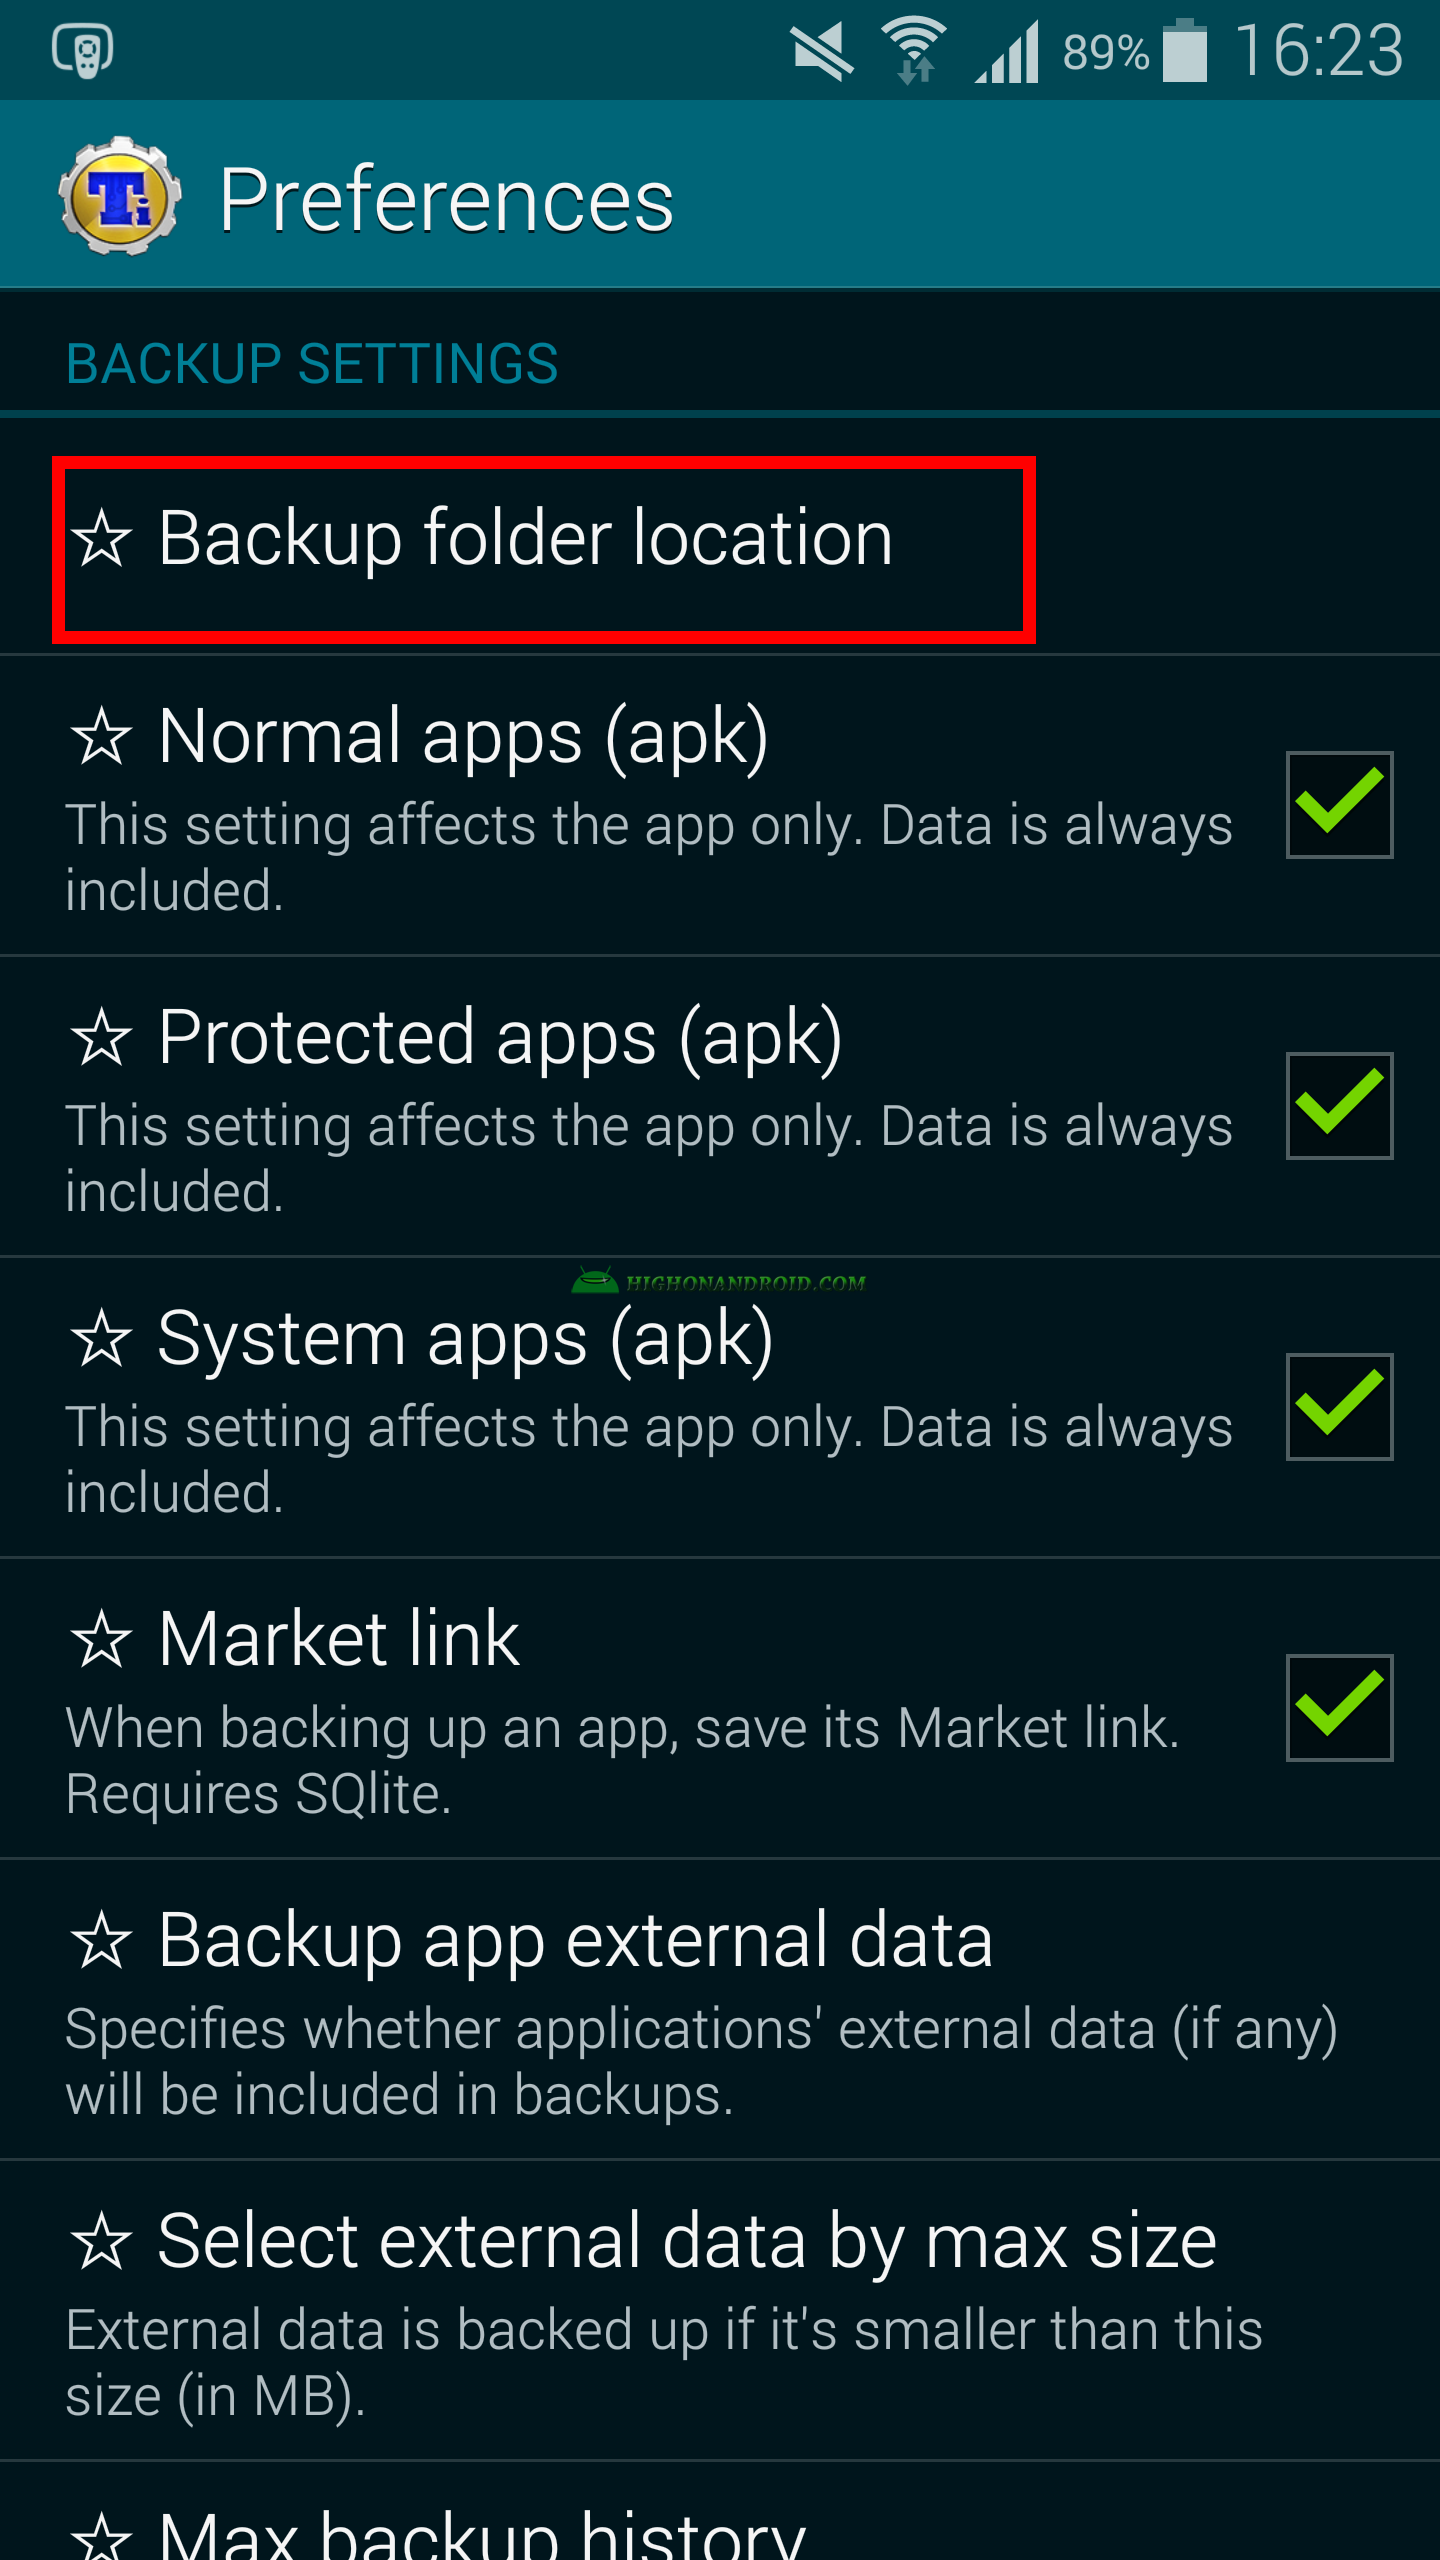
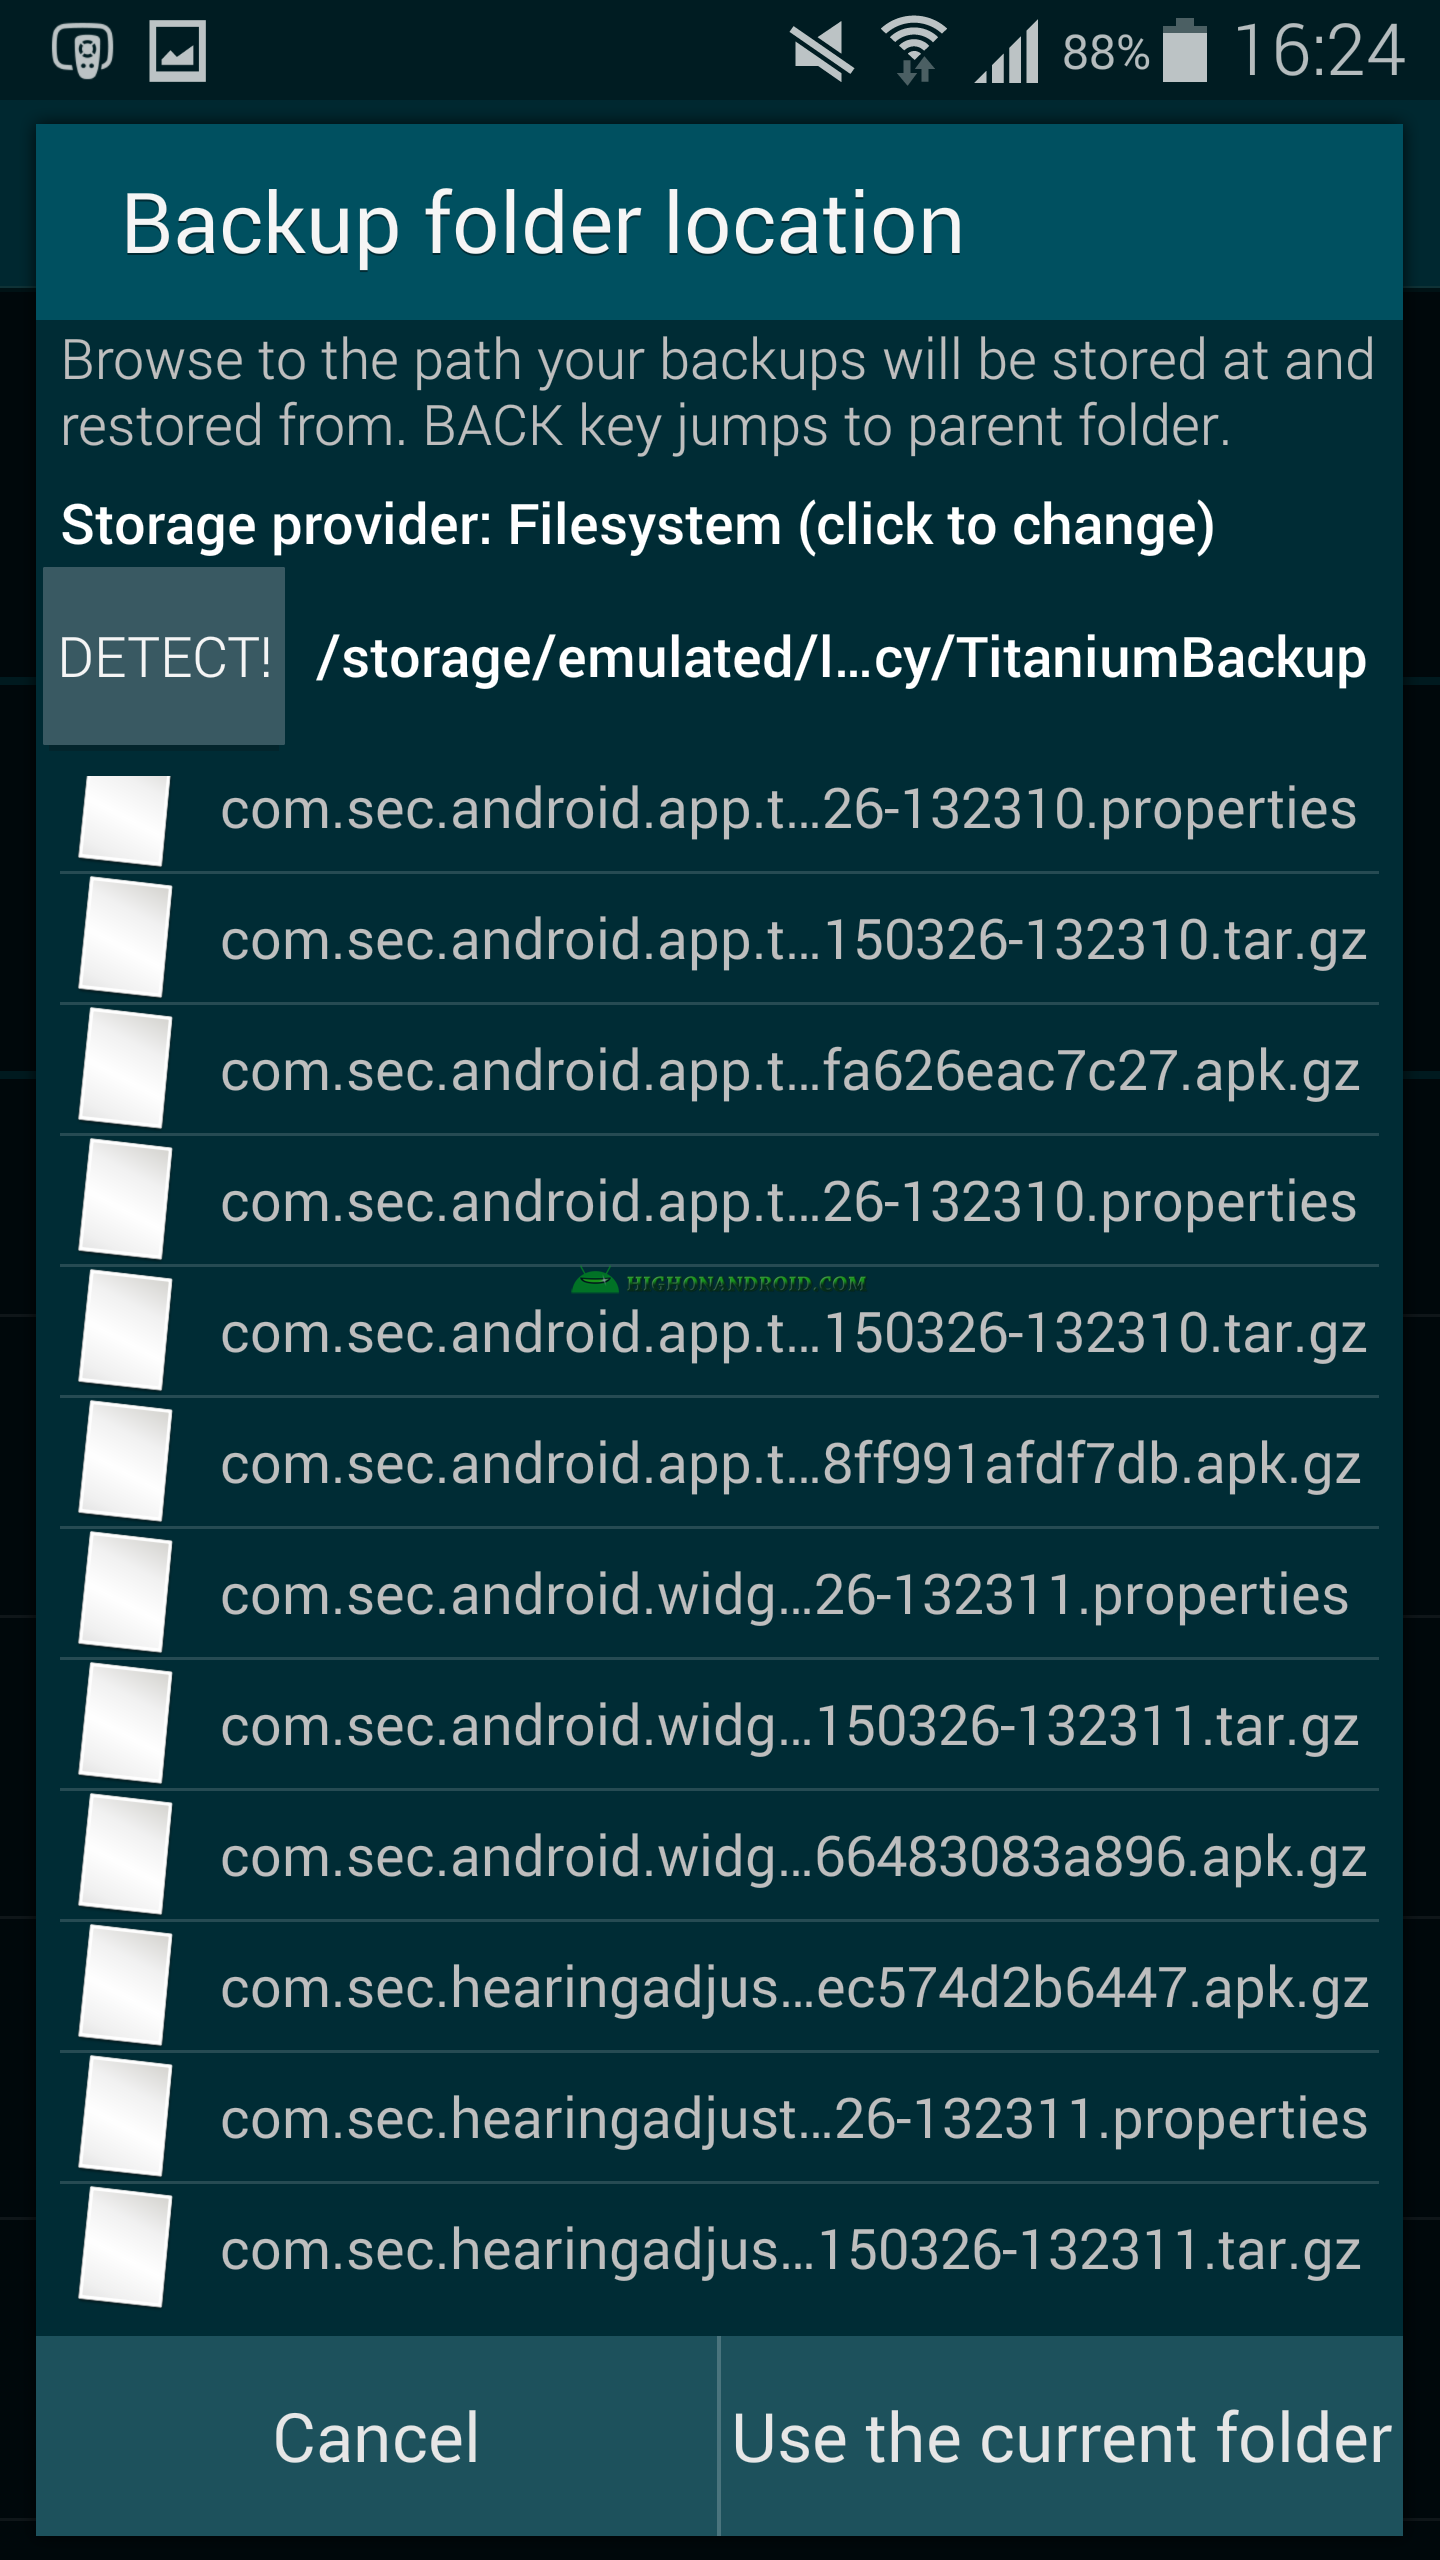
We can also change backup location on internal storage and several other things.
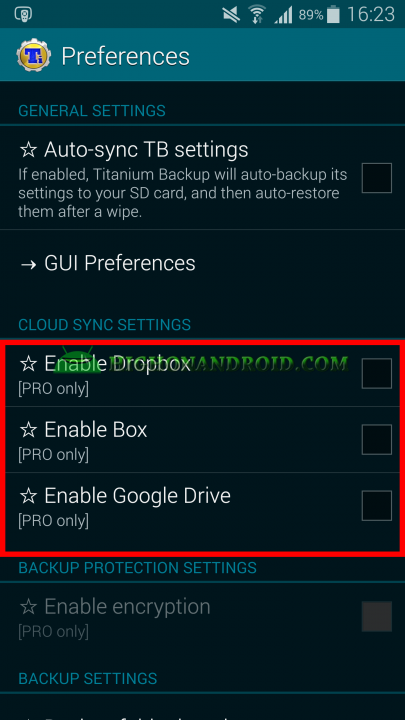
See MENU > Preferences > Backup folder location

> We can also send the backup file to the cloud services including Drop Box, Box, Google Drive (PRO Version only).
Restore (Easiest Method)
Steps:
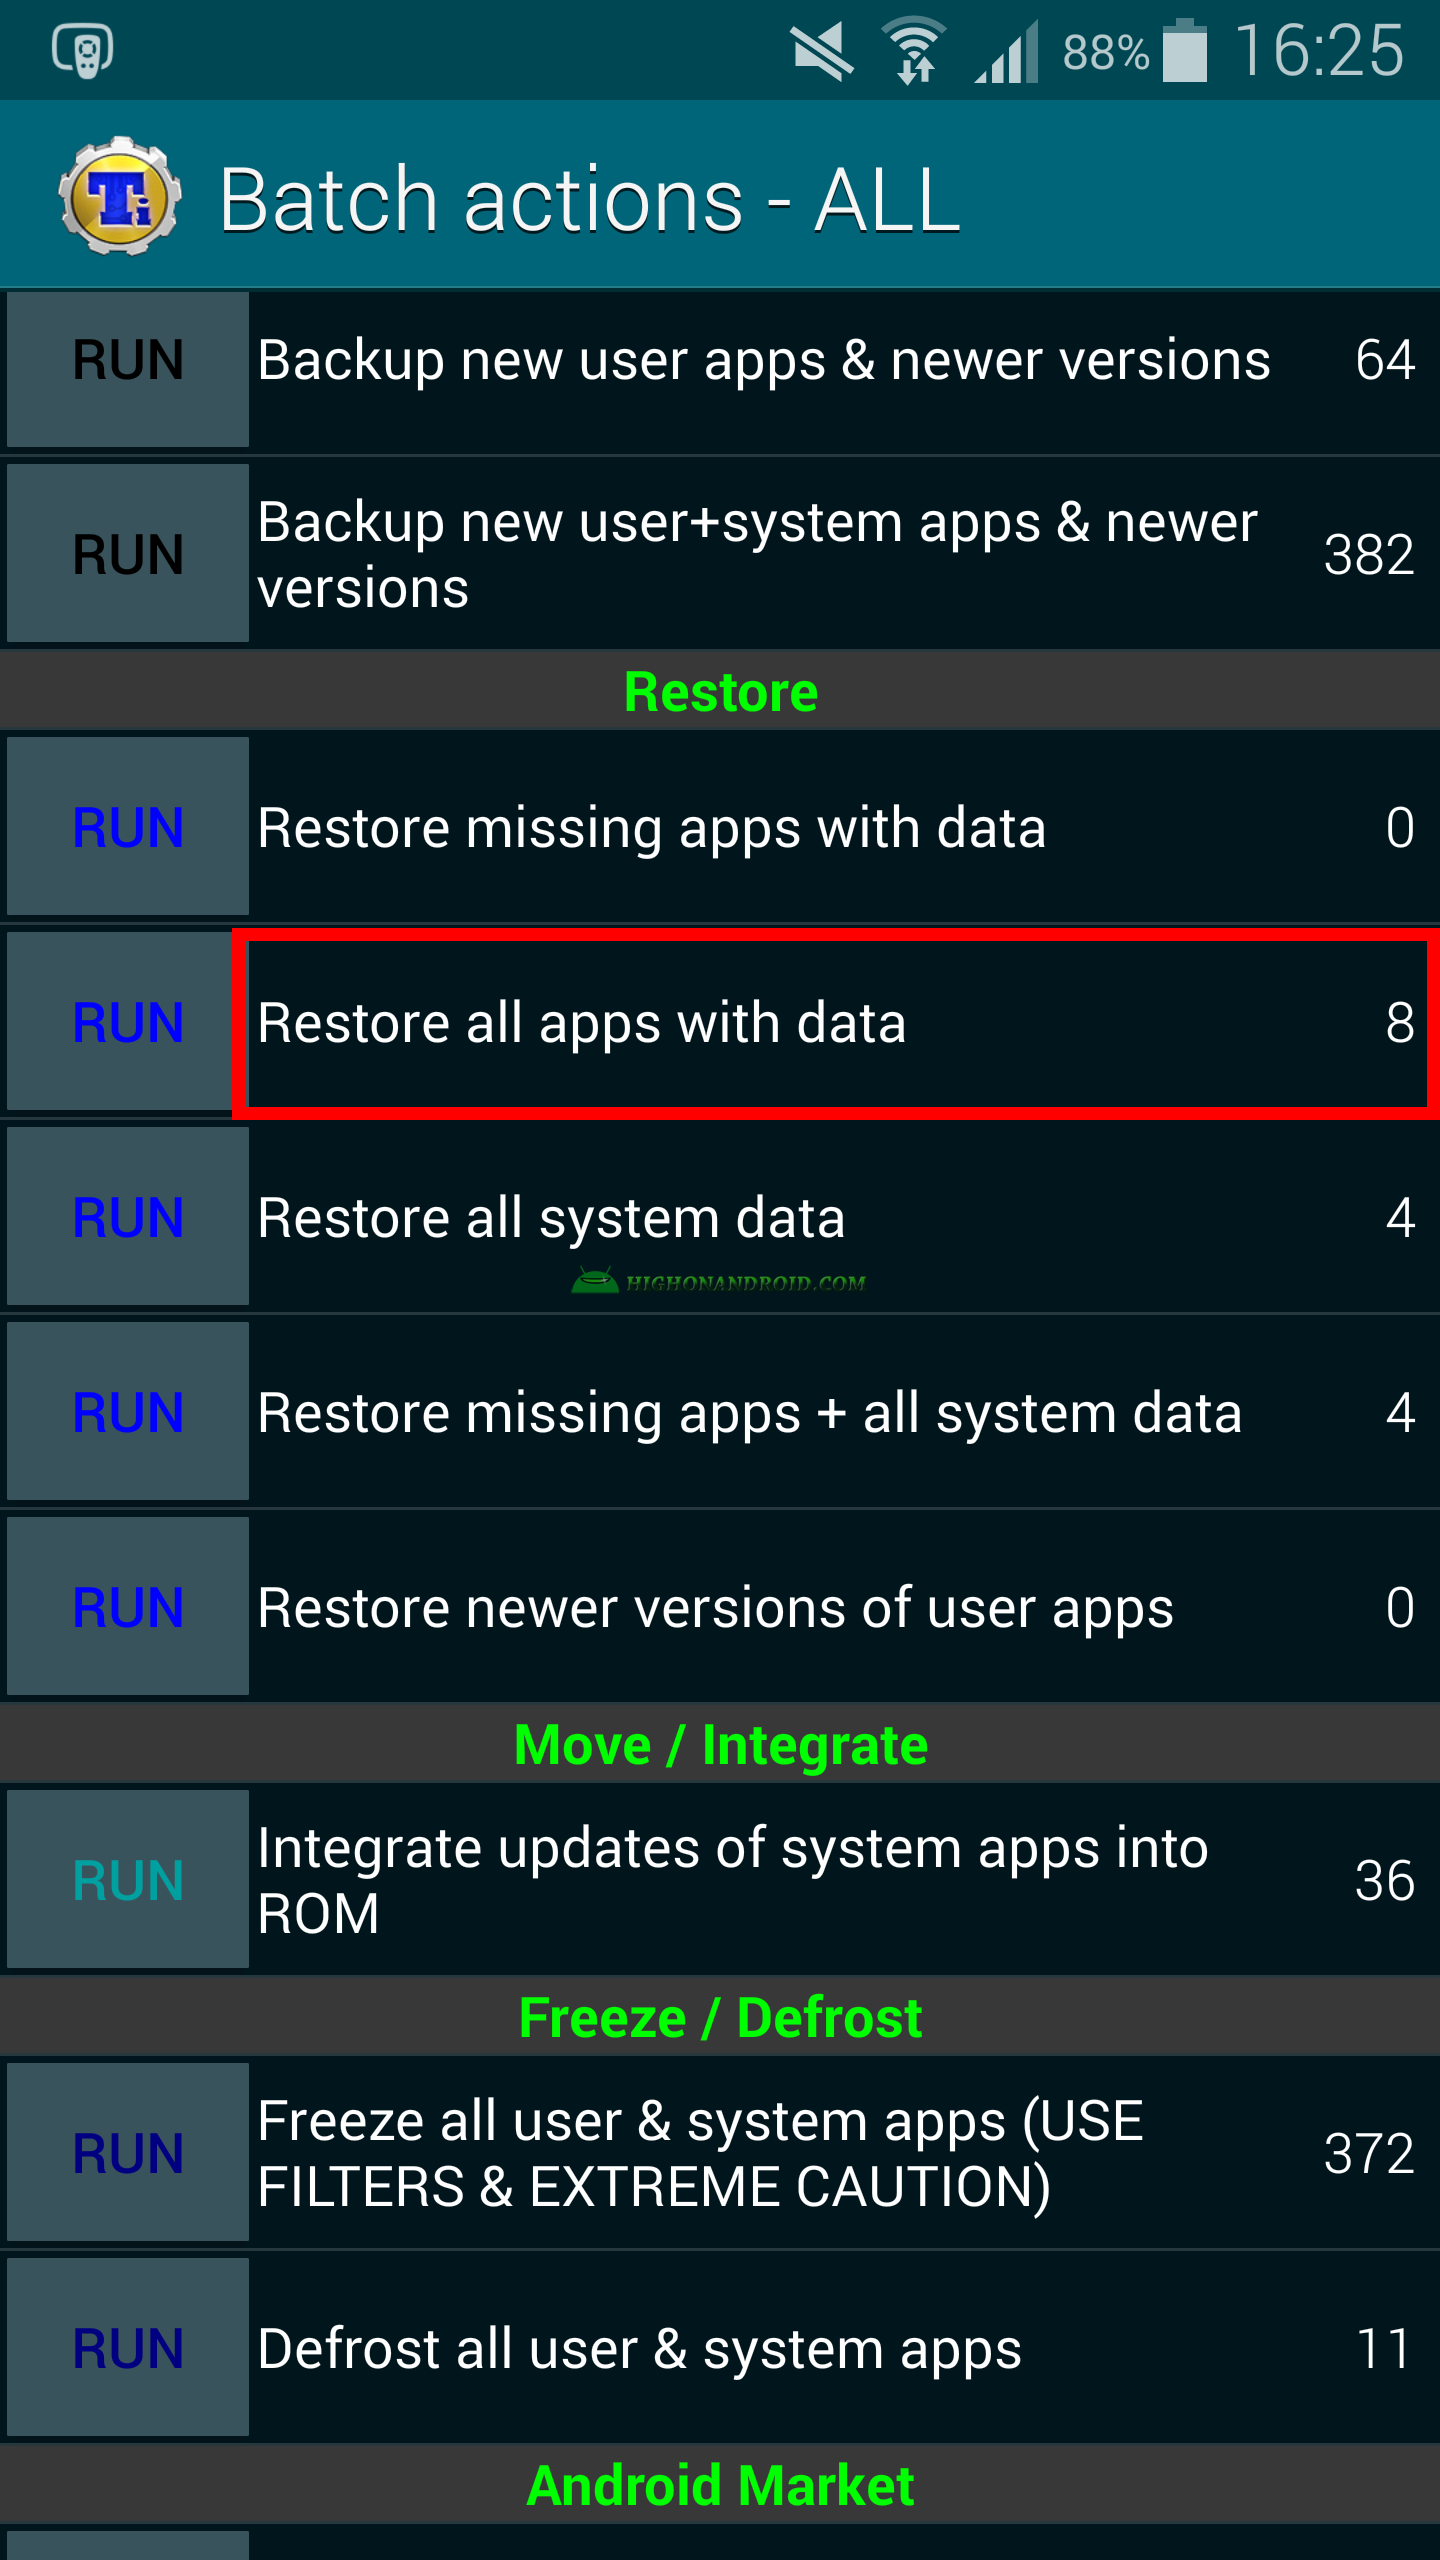
Step 1) Tap on the check sign at the top right corner of the screen. Step 2) Go to restore section and choose “Restore all apps with data”.
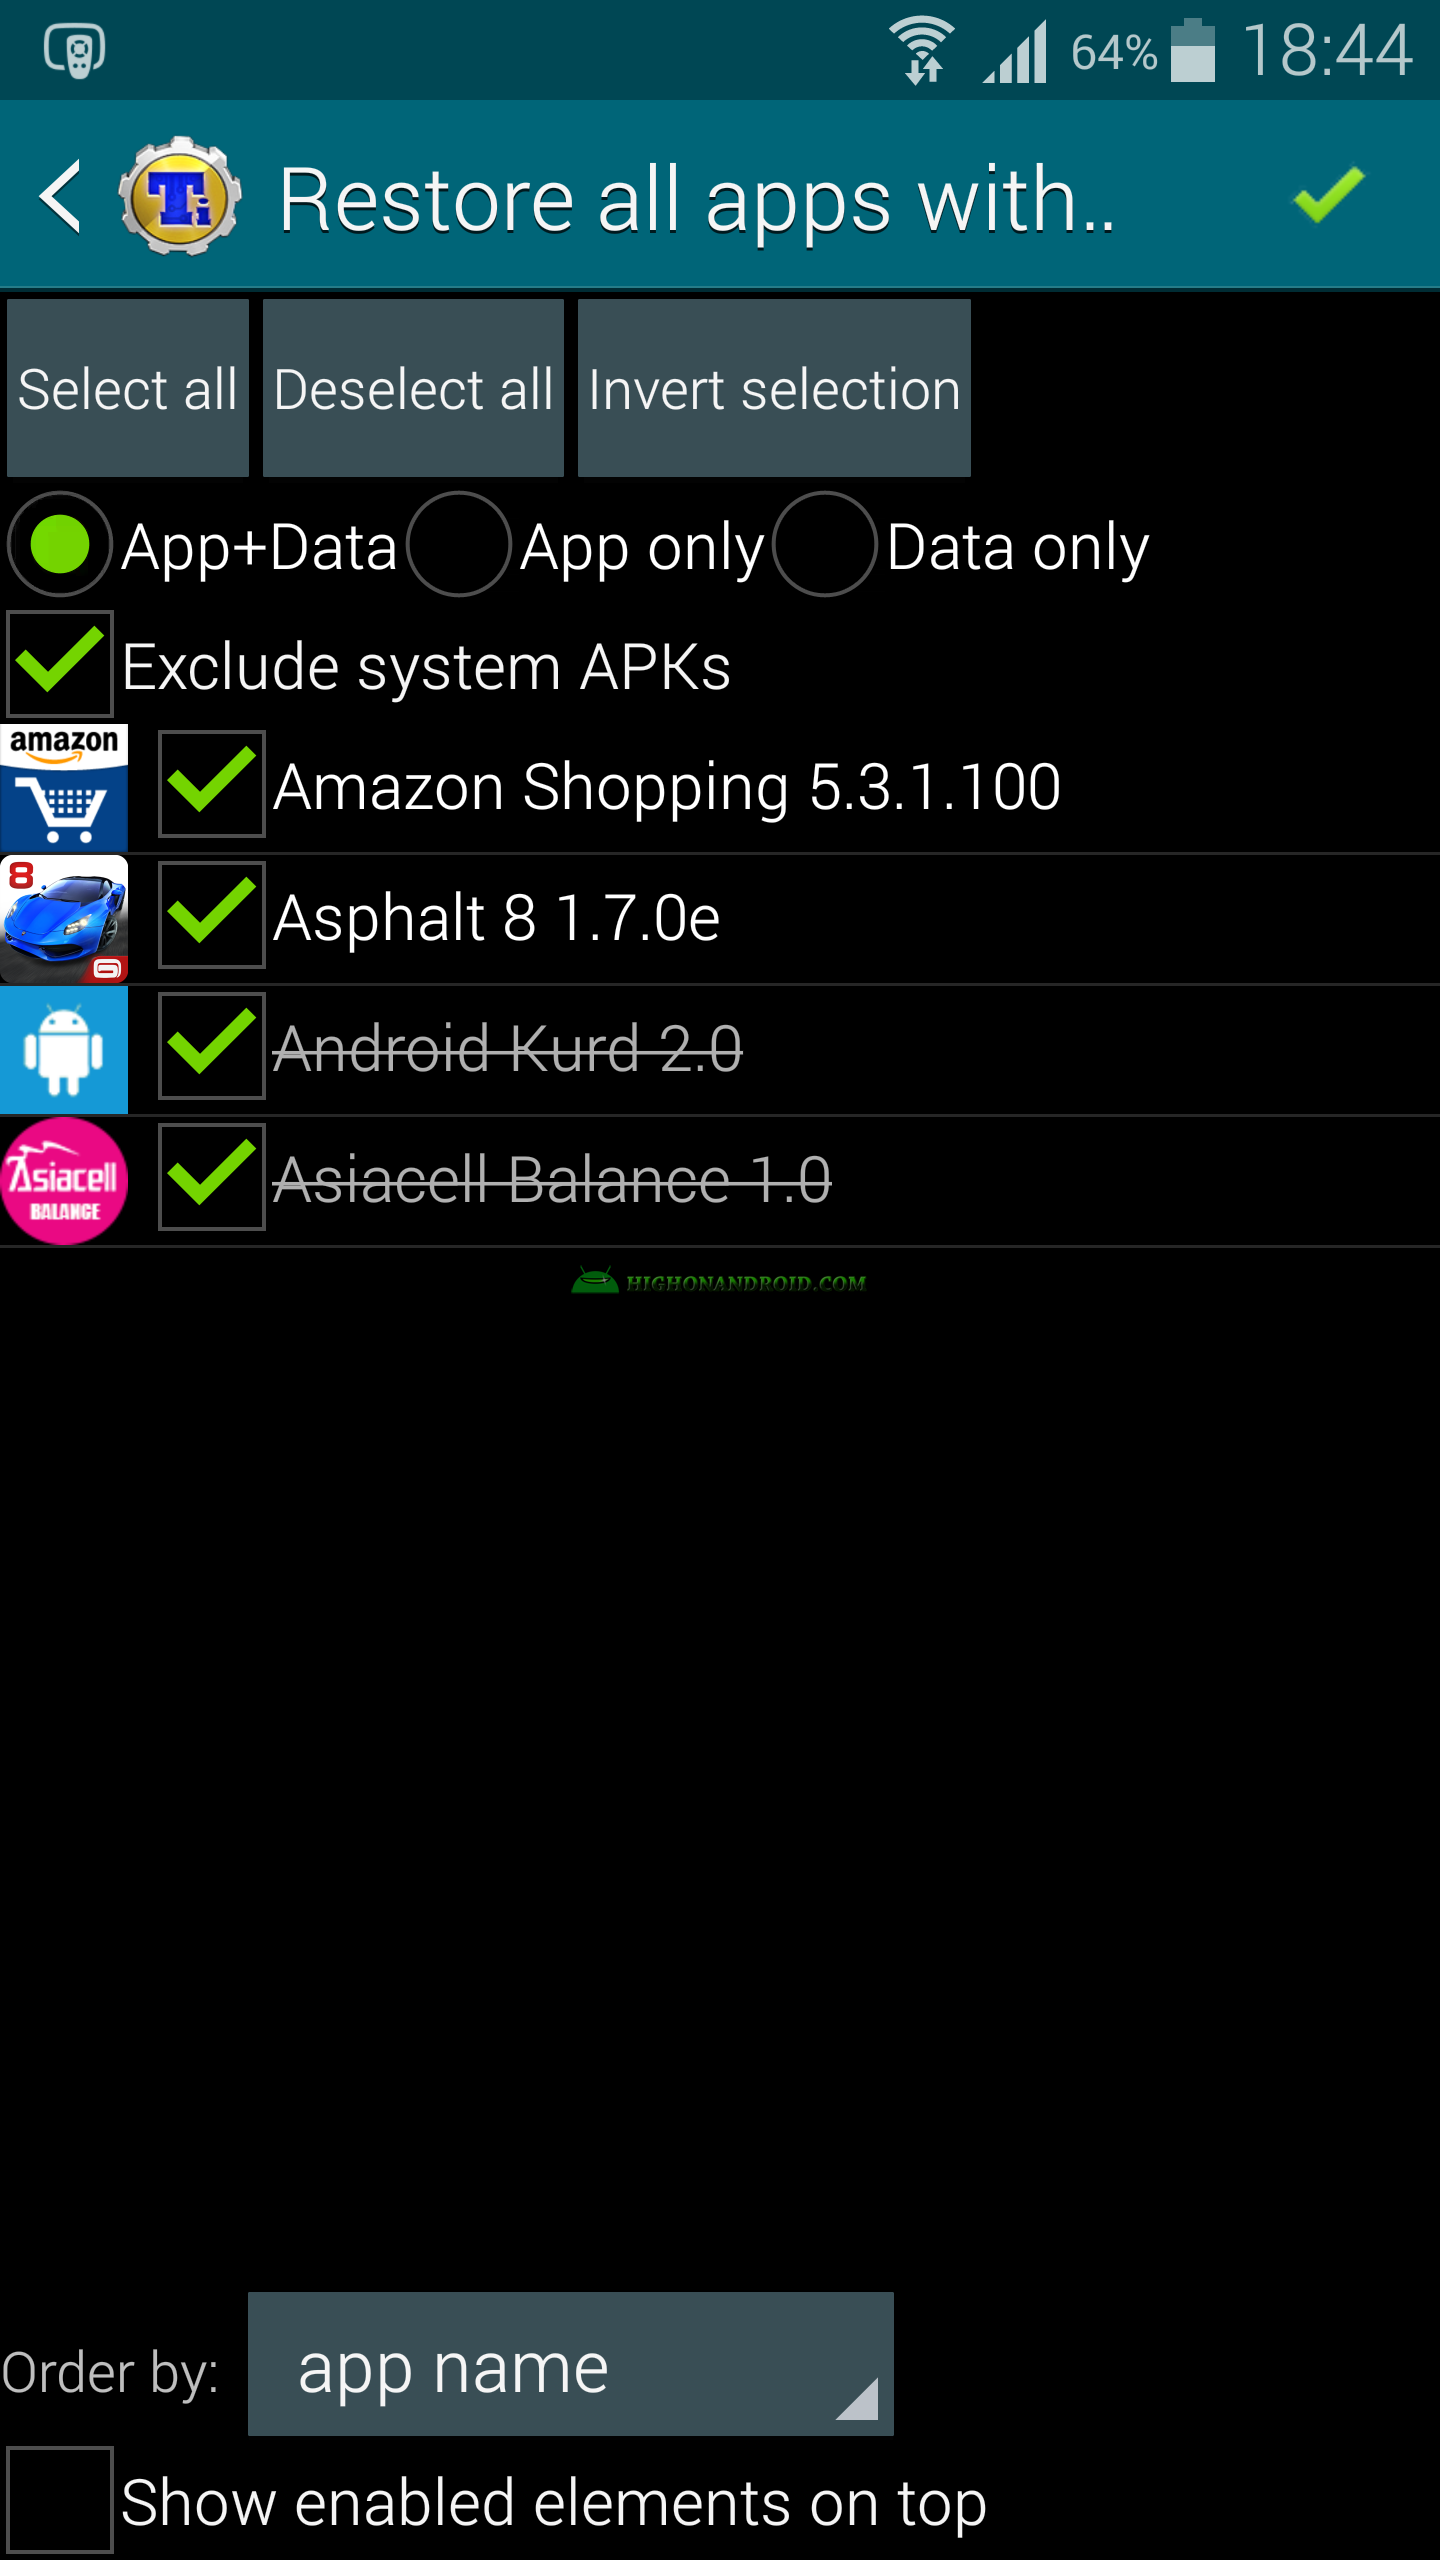
Step 3) The following will show up, showing us the apps to be restored. We can choose all apps or select only specific apps to be restored.
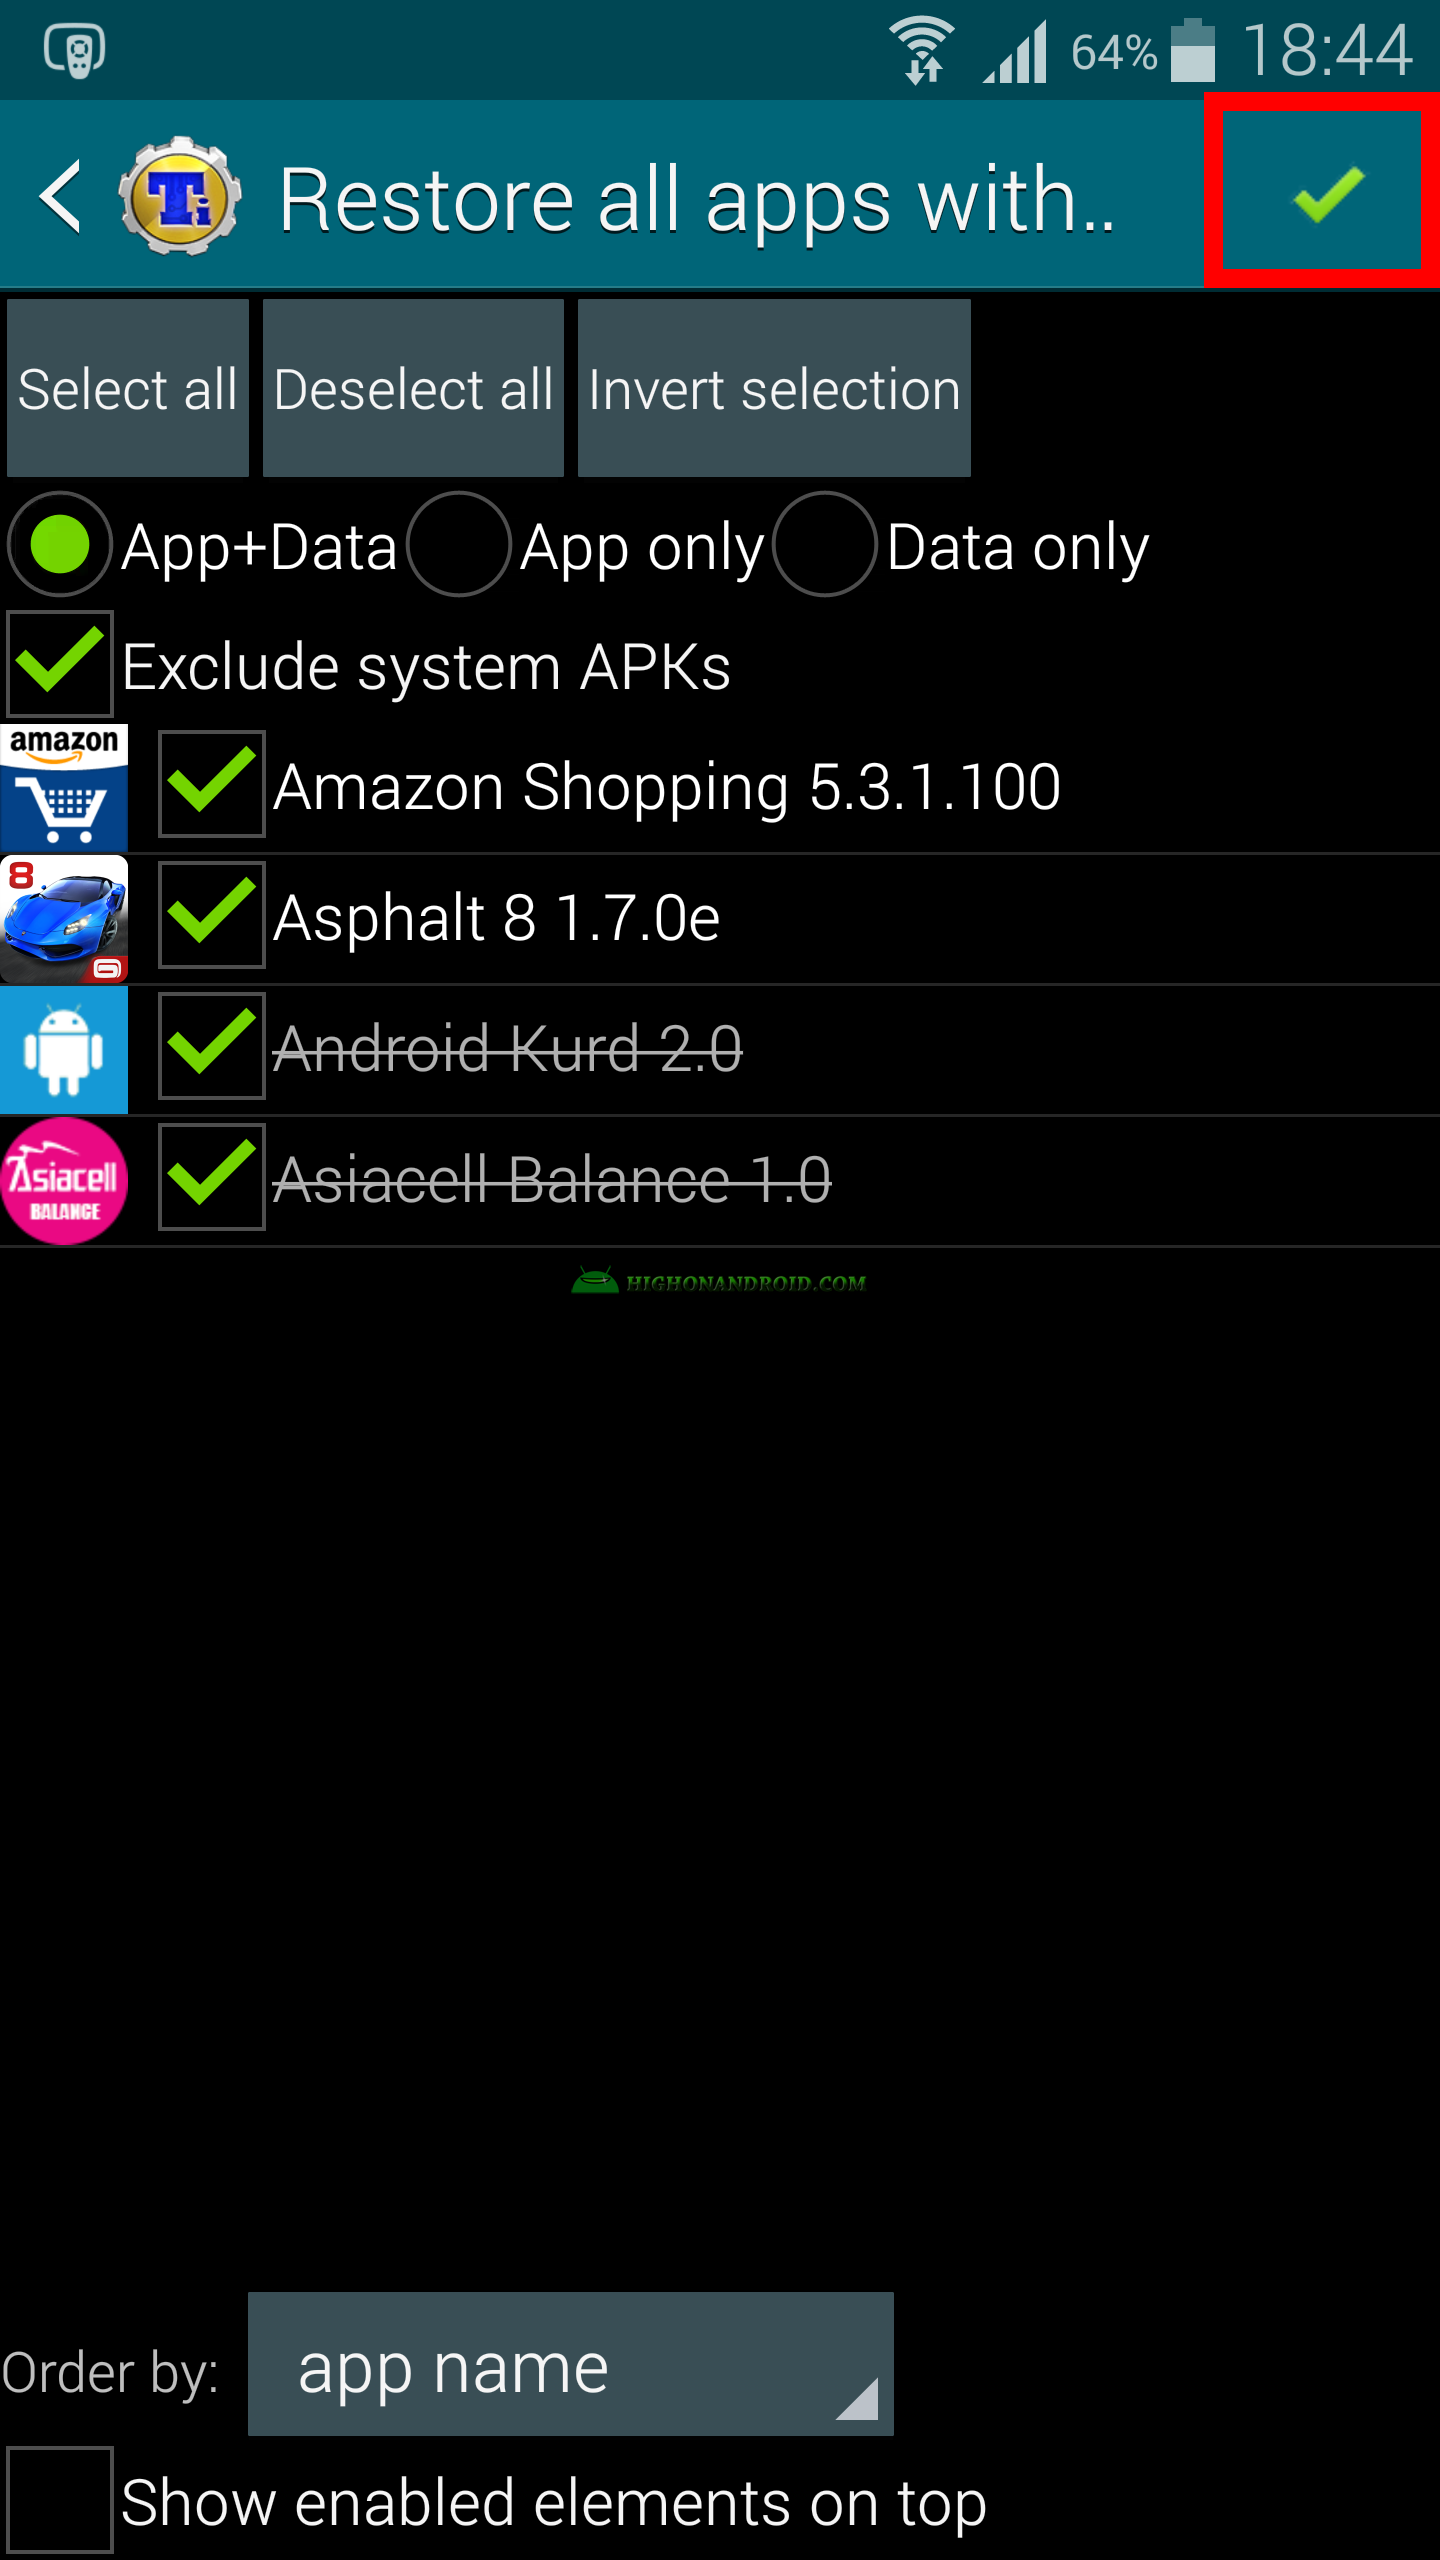
Step 5) After that tap on the check sign at the top right corner of the screen to start restoring.
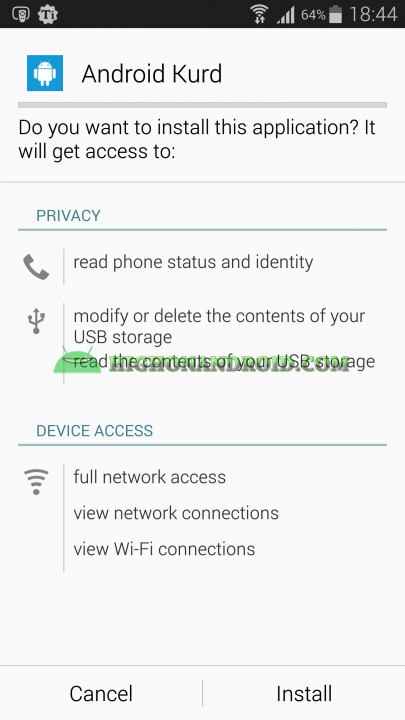
Step 6) The restoring process will start and for each restored apps, titanium backup will prompt you with an installation window to re-install the app (with its data). The PRO version does this automatically, we highly recommended.

7. Follow the installation process, after the installation is finished, DO NOT open the app.
8. Tap on the finish button to go back to restoring next app, till the restoring process finishes completely.
Note:
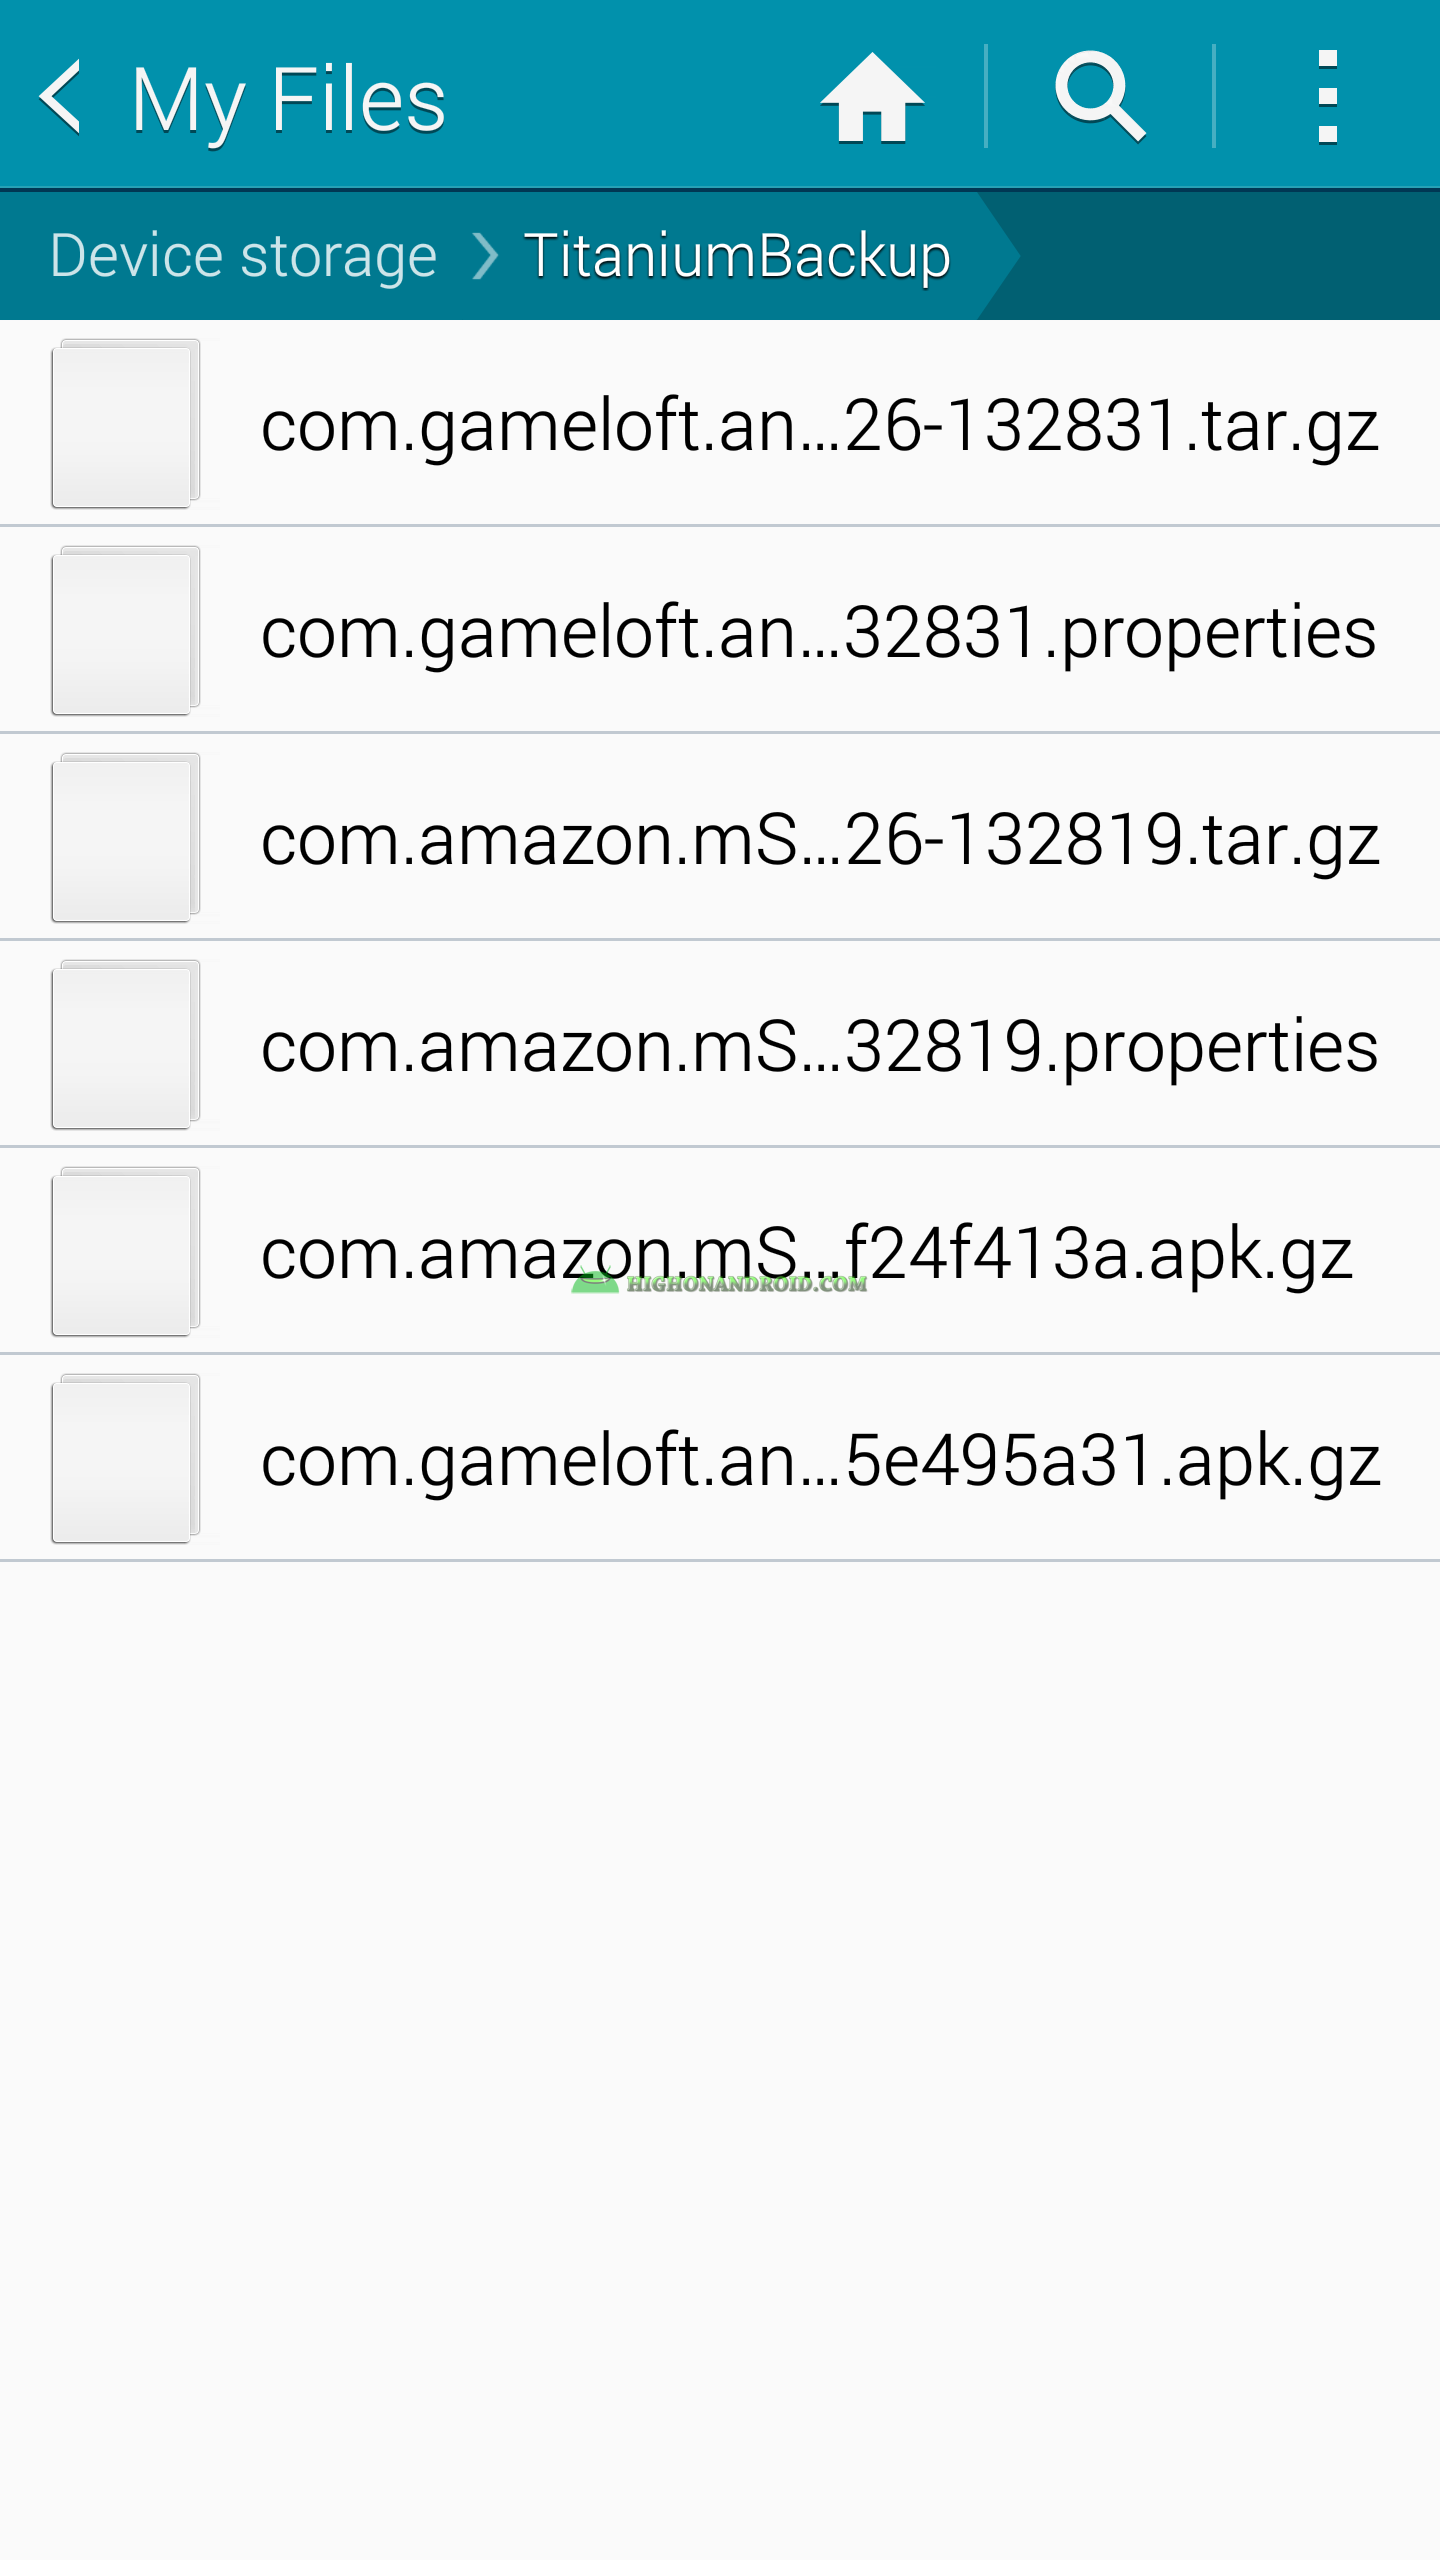
> Titanium backup folder is on the root of external storage.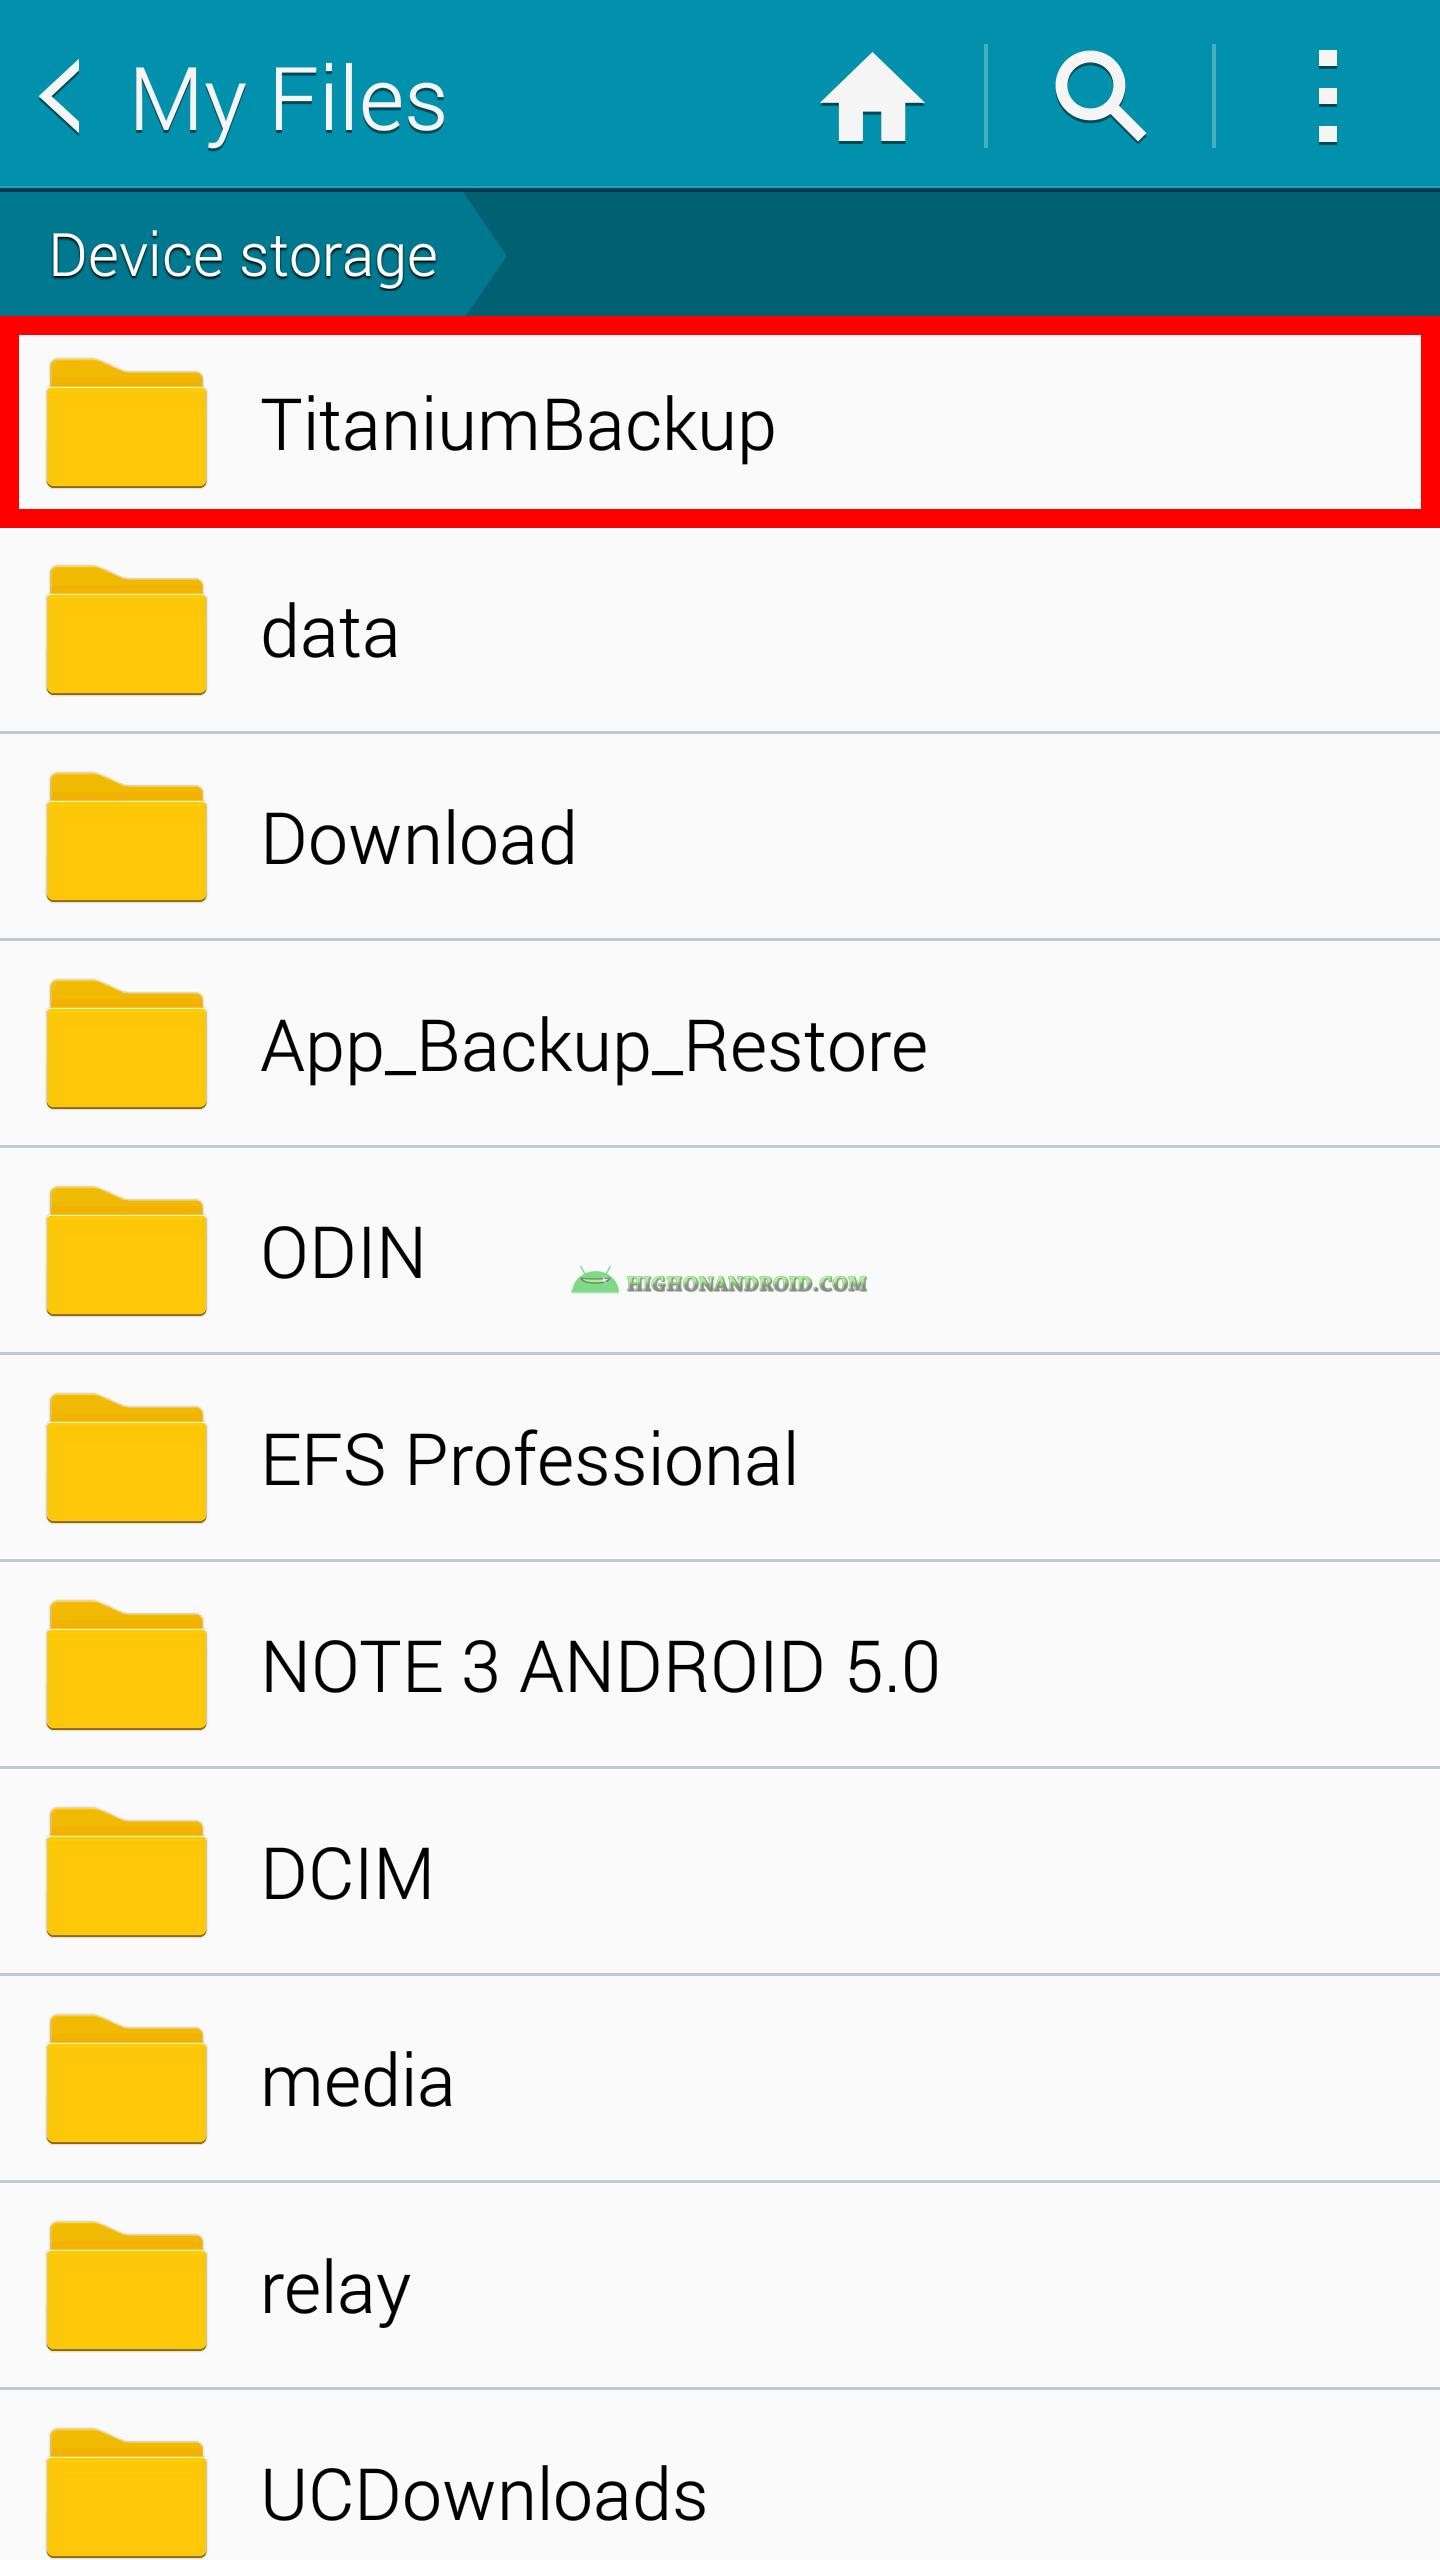
> Inside the folder we can see various .apk.gz , .gz files related to the backed up apps with their data.
That’s it, hope you got hang of it and as always, don’t forget to share the tutorial with your friends!
0 comments: